.NET Core Workers in Azure Container Instances
In .NET Core 3.0 we are introducing a new type of application template called Worker Service. This template is intended to give you a starting point for writing long running services in .NET Core. In this walkthrough you’ll learn how to use a Worker with Azure Container Registry and Azure Container Instances to get your Worker running as a microservice in the cloud.
Since the Worker template Glenn blogged about is also available via the dotnet new command line, I can create one on my Mac and edit the code using Visual Studio for Mac or Visual Studio Code (which I’ll be using here to take advantage of the integrated Docker extension).
dotnet new worker
I’ll use the default from the Worker template. As it will write to logs during execution via ILogger, I’ll be able to tell quickly from looking in the logs if the Worker is running.
public class Worker : BackgroundService
{
    private readonly ILogger<Worker> _logger;

    public Worker(ILogger<Worker> logger)
    {
        _logger = logger;
    }

    protected override async Task ExecuteAsync(CancellationToken stoppingToken)
    {
        while (!stoppingToken.IsCancellationRequested)
        {
            _logger.LogInformation("Worker running at: {time}", DateTimeOffset.Now);
            await Task.Delay(1000, stoppingToken);
        }
    }
}
Visual Studio Code’s Docker tools are intelligent enough to figure out this is a .NET Core app, and will suggest the correct Docker file via the Command Palette’s Add Docker files to workspace option.

By right-clicking the resulting Dockerfile I can build the Worker into a Docker image in one click.

The Build Image option will package my Worker’s code into a Docker container locally. The second option, ACR Tasks: Build Image would use Azure Container Registry Tasks to build the image in the cloud, rather than on disk. This is helpful for scenarios when the base image is larger than I want to download locally or when I’m building an application on a Windows base image from Linux or Mac. You can learn more about ACR Tasks in the ACR docs. The Azure CLI makes it easy to login to the Azure Container Registry using the Azure CLI. This results in my Docker client being authenticated to the Azure Container Registry in my subscription.
az acr login -n BackgroundWorkerImages
This can be done in the VS Code integrated terminal or in the local terminal, as the setting will be persisted across the terminals’ environment. It can’t be done using the cloud shell, since logging into the Azure Container Registry requires local shell access so local Docker images can be accessed. Before I push the container image into my registry, I need to tag the image with the URI of the image once it has been pushed into my registry. I can easily get the ACR instance URI from the portal.

I’ll copy the URI of the registry’s login server in the portal so I can paste it when I tag the image later.

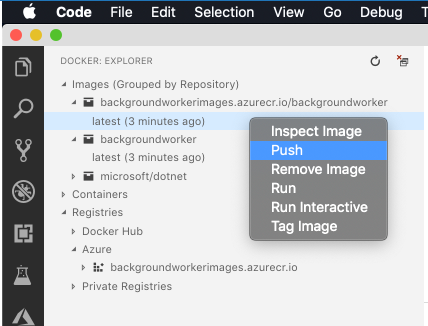
By selecting the backgroundworker:latest image in Visual Studio Code’s Docker explorer pane, I can select Tag Image.

I’ll be prompted for the tag, and I can easily paste in the URI I copied from the portal.

Finally, I can right-click the image tag I created and select Push, and the image will be pushed into the registry. Once I have a Docker image in the registry, I can use the CLI or tools to deploy it to Azure Container Instances, Kubernetes, or even Azure App Service.

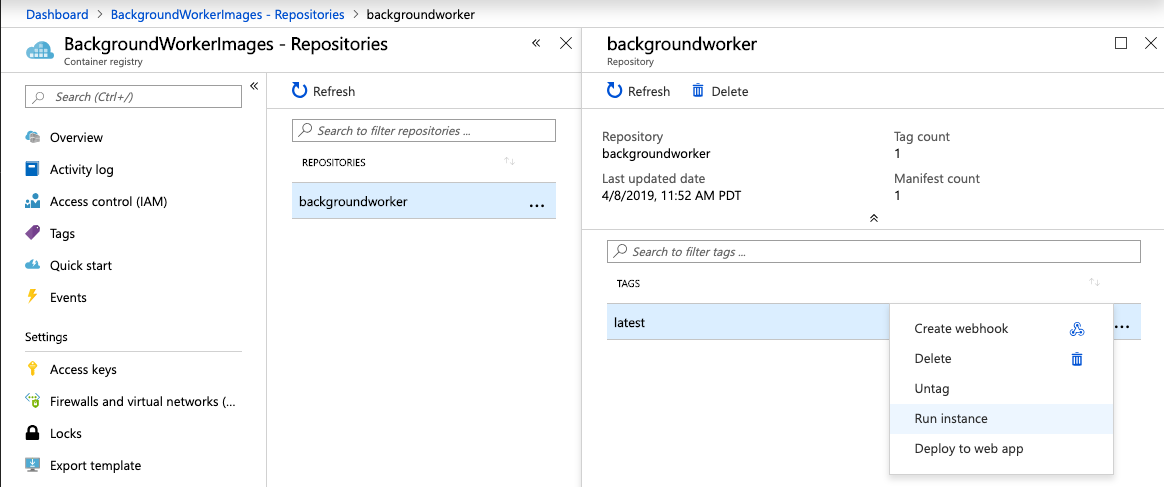
Now that the worker is containerized and stored in the registry, starting an instance of it is one click away.

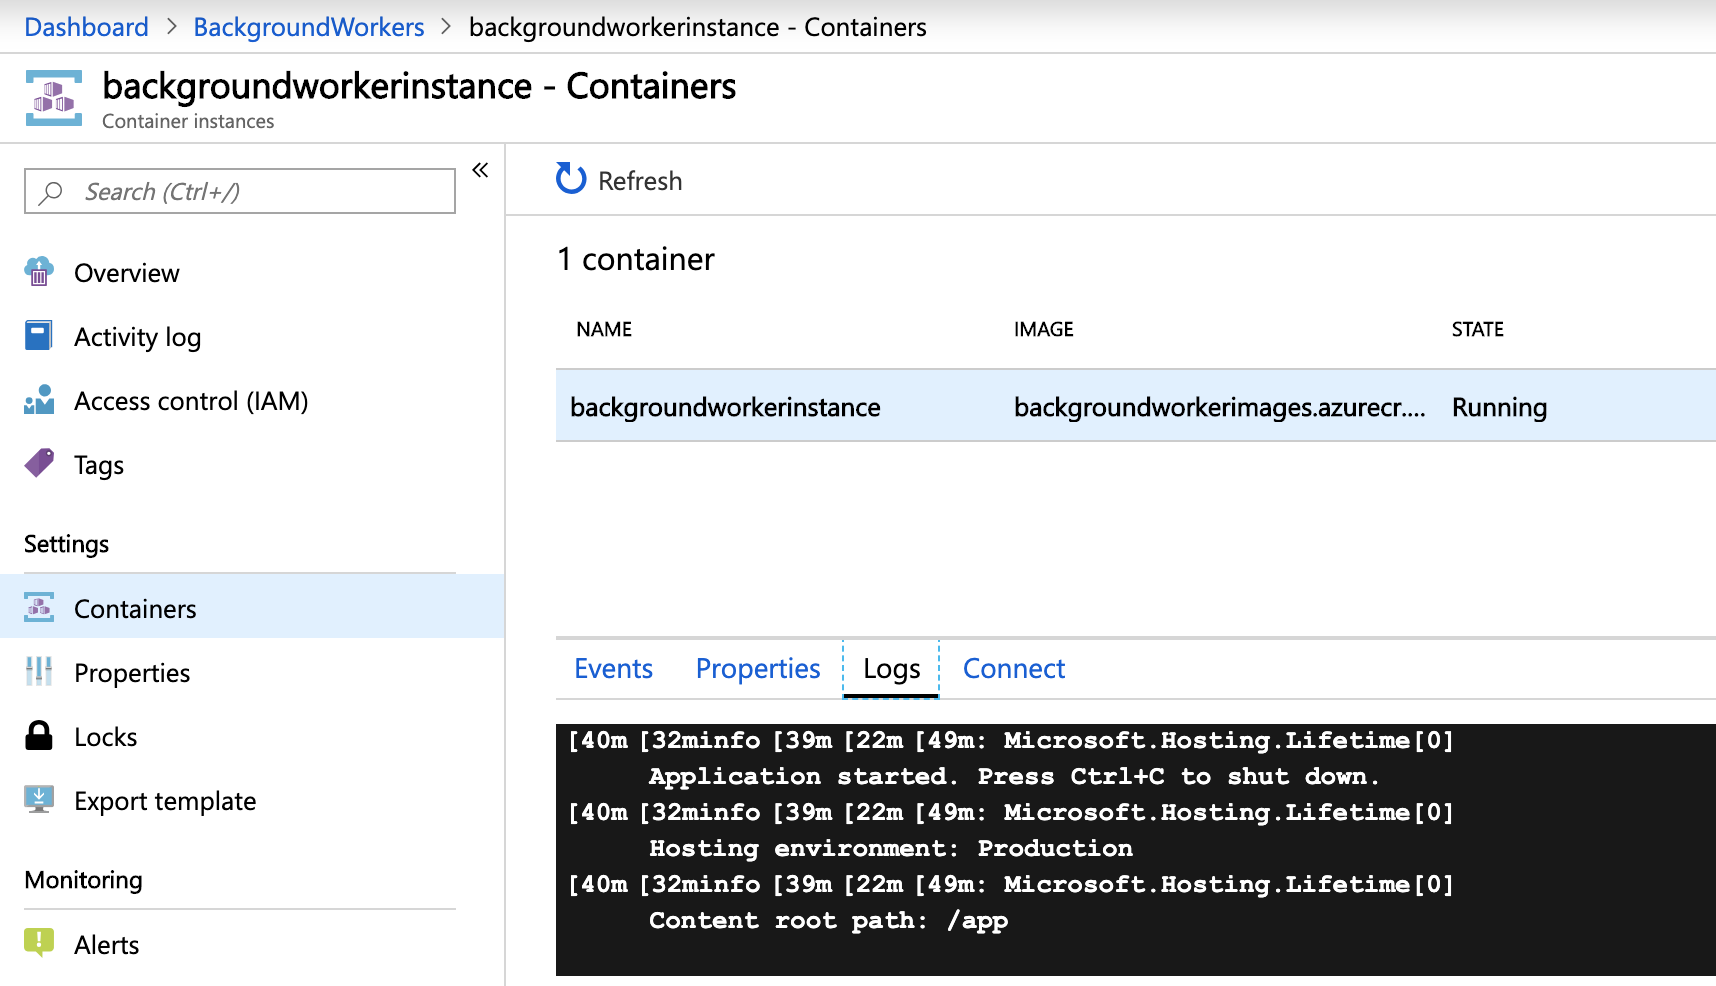
Once the container instance starts up, I’ll see some logs indicating the worker is executing, but these are just the basic startup logs and not my information-level logs I have in my Worker code.

Since I added Information-level logs during the worker’s execution, the configuration in appsettings.json (or the environment variable for the container instance) will need to be updated to see more verbose logs.
{
  "Logging": {
    "LogLevel": {
      "Default": "Information",
      "Microsoft.Hosting.Lifetime": "Information"
    }
  }
}
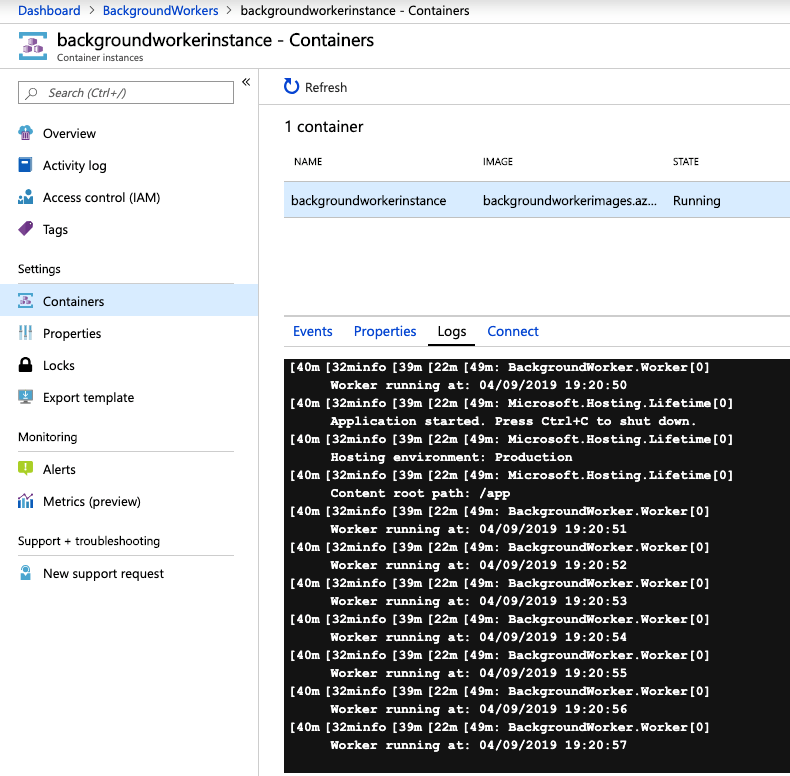
Once the code is re-packaged into an updated Docker image and pushed into the Azure Container Registry, following a simple Restart…

… more details will be visible in the container instance’s logging output.

The Worker template makes it easy to create long-running background workers that you can run for as long as you need in Azure Container Instances. New container instances can be created using the portal or the Azure Command Line. Or, you can opt for more advanced scenarios using Azure DevOps or Logic Apps. With the Worker template making it easy to get started building microservices using your favorite ASP.NET Core idioms and Azure’s arsenal of container orchestration services you can get your microservices up and running in minutes.
The post .NET Core Workers in Azure Container Instances appeared first on ASP.NET Blog.