In preview7 a new package was added to the Microsoft.Extensions set of packages that enables integration with systemd. For the Windows focused, systemd allows similar functionality to Windows Services, there is a post on how to do what we discuss here for Windows Services in this post. This work was contributed by Tom Deseyn from Red Hat. In this post we will create a .NET Core app that runs as a systemd service. The integration makes systemd aware when the application has started/is stopping, and configures logs to be sent in a way that journald (the logging system of systemd) understands log priorities.
Create and publish an app
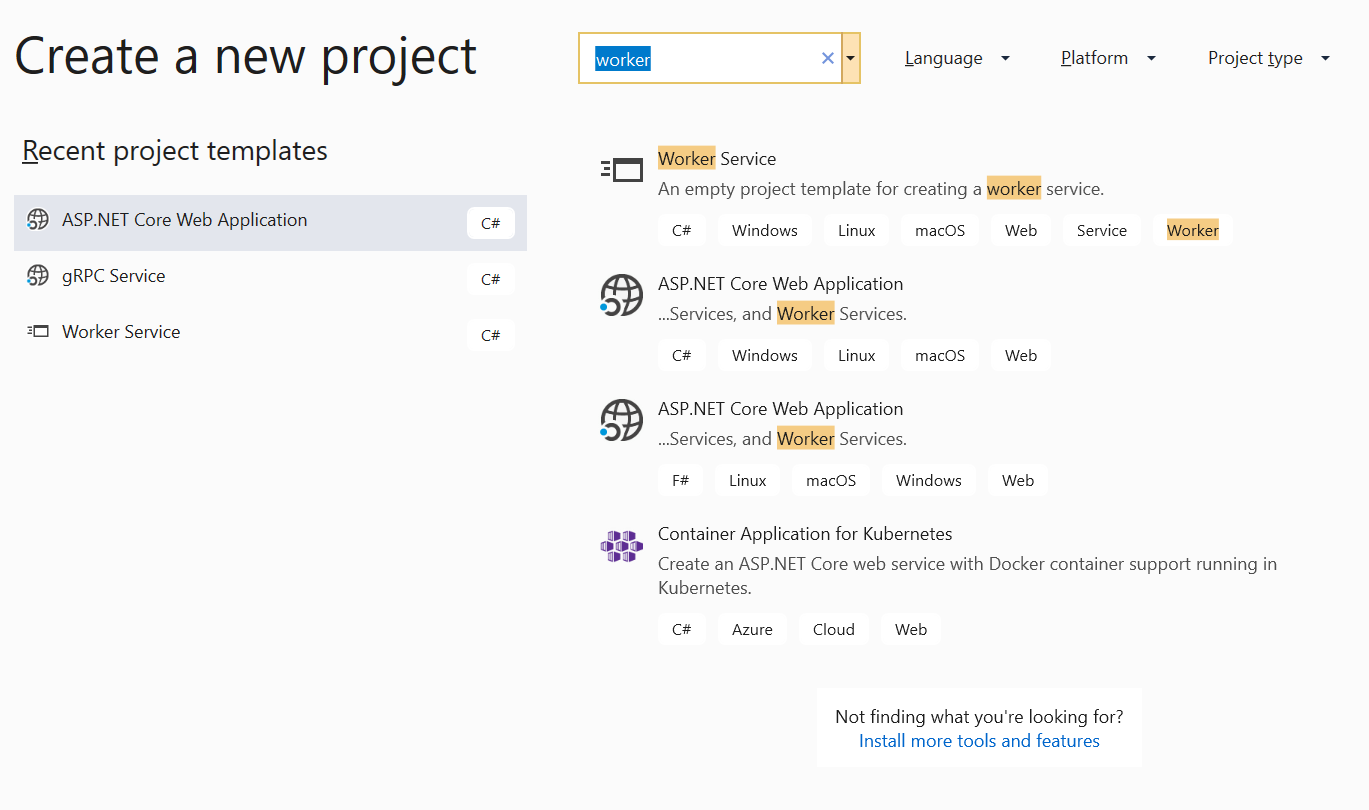
First let’s create the app that we will use. I’m going to use the new worker template, but this would also work well with an ASP.NET Core app. The main restriction is that it needs to be using a Microsoft.Extensions.Hosting based app model.
In VS:

Command Line:
When using the command line you can run:
dotnet new worker
This command will create you a new worker app the same as the VS UI. Once we have our app we need to add the Microsoft.Extensions.Hosting.Systemd NuGet package, you can do this by editing your csproj, using the CLI, or using VS UI:
Once you’ve added the NuGet package you can add a call to UseSystemd in your program.cs:
At this point you have configured your application to run with systemd. The UseSystemd method will noop when not running as a daemon so you can still run and debug your app normally or use it in production both with and without systemd.
Create unit files
Now that we have an app we need to create the configuration files for systemd that tell it about the service so that it knows how to run it. To do that you create a .service file (there are other types of unit file, the .service file is what we will use since we are deploying a service). You need this file on the Linux machine that you will be registering and running the app on. A basic service file looks like this:
This file needs to exist in the /etc/systemd/system/ directory, /etc/systemd/system/testapp.service in our case. By specifying Type=notify an application can notify systemd when the host has started/is stopping. Once the file exists in the directory run the following for systemd to load the new configuration file using the systemctl command which is how you interact with systemd:
sudo systemctl daemon-reload
After that if you can run the following to see that systemd knows about your service:
sudo systemctl status testapp
(replacing testapp with the name of your app if you used a different name)
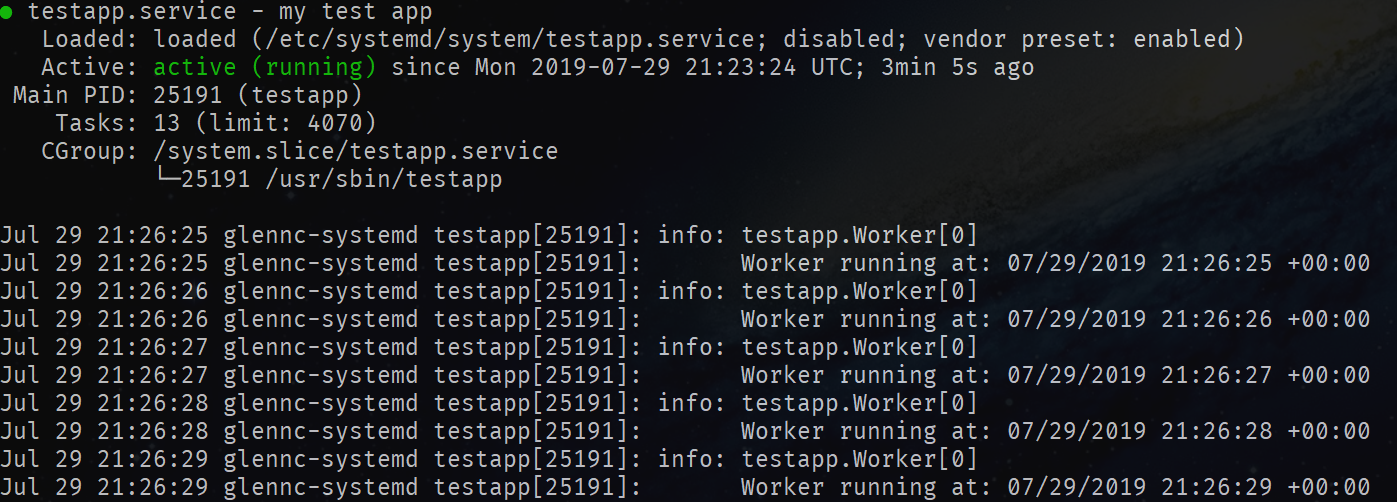
You should see something like the following:

This shows that the new service you’ve registered is disabled, we can start our service by running:
sudo systemctl start testapp.service
Because we specified Type=notify systemd is aware when the host has started, and the systemctl start will block until then. If you re-run sudo systemctl status testapp you will see something like the following:

If you want your service to start when the machine does then you can use:
sudo systemctl enable testapp.service
You will see that the status message now changes to say enabled instead of disabled when running systemctl status.
If you are having trouble getting your app to start for some reason then you should make sure that you can run the file in the ExecPath yourself in the terminal first, then use systemctl status to see what messages you are getting from the app when it fails to start.
Exploring journalctl
Now that we have an app running with systemd we can look at the logging integration. One of the benefits of using systemd is the centralized logging system that you can access with journalctl.
To start, we can view the logs of our service by using journalctl, a command to access the logs:
sudo journalctl -u testapp
This displays all the logs for the unit (-u) file with testapp in the name. You could be more specific by using testapp.service. If you run journalctl without specifying the service you are interested in then you will see logs from all services interleaved with each other as all logs are seen as one big log stream in this system. You use journalctl to focus that single log stream to what you are interested in at the time.
Running the command would give you output that looks like:
You can see the logging is different than when running from the terminal: each message is on a single line. systemd is also aware of the log priorities. To show this in action I added a few log statements to my testapp and run again:
Then if I run sudo journaltcl -u testapp I see:

In this log output the tool has highlighted the critical log message in red and shows that the lifetime of my app is now the SystemdLifetime proving to me that the integration has worked. The tool can do this because when calling UseSystemd we map Extensions.LogLevel to syslog log levels:
| LogLevel | Syslog level | systemd name |
| Trace/Debug | 7 | debug |
| Information | 6 | info |
| Warning | 4 | warning |
| Error | 3 | err |
| Critical | 2 | crit |
With this information I can run sudo journalctl -p 3 -u testapp which will filter log messages to only display critical and error logs.
Conclusion
If you’re using .NET Core apps with systemd then we think this package should give you a much better experience, and we hope you try it out and tells us any other features you’d like to see by logging issues on GitHub. If you are going to use this to run a web app then there is some additional guidance on the ASP.NET Docs page.
The post .NET Core and systemd appeared first on .NET Blog.