GitHub Actions uses a clean new syntax for expressing workflows based on YAML scripts—so you can edit, reuse, share, and fork them like code. By including actions in your repositories, others would be able to easily test and build projects using the same actions used on the original projects.
GitHub Actions allows you to build, test, and deploy applications in your language of choice including .NET, C/C++, and Python. Feel free to explore all the supported languages. This blog will go over the steps needed to add actions to a new Visual Studio project and automate deployment to a Linux environment using Visual Studio.
As of the date of this post GitHub Actions is still a beta feature. In order for you to try it out, you will need to sign up for the beta first. Feel free to jump to step 4 if you already have a project published on GitHub.
1- Start by creating any new Visual Studio project. For this blog, I am creating a new Flask Web Project. For more information on how to get started with Flask in Visual Studio take a look at this documentation: Get started with the Flask web framework in Visual Studio

2- Let’s make sure that our app runs locally without any issues by selecting Debug > Start Debugging (F5) or by using the Web Server button on the toolbar.

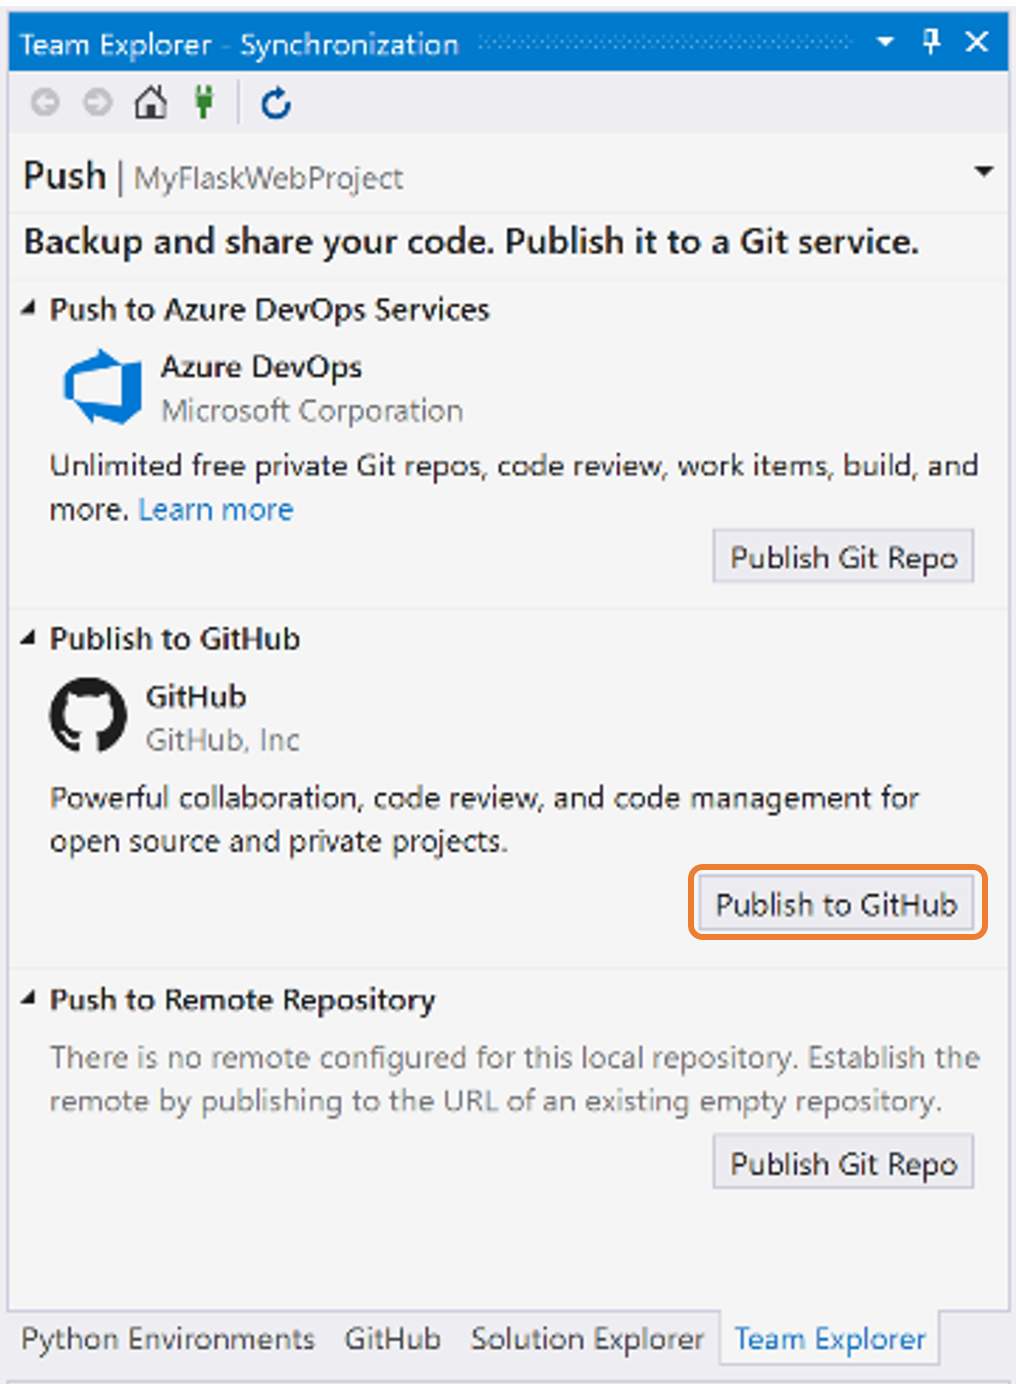
3- Use the Add to Source Control option on the right-hand side of the status bar to Publish to GitHub as shown below.
4- To add an Actions script, create a new YAML file for your workflow in a new directory called .github/workflows as shown below.
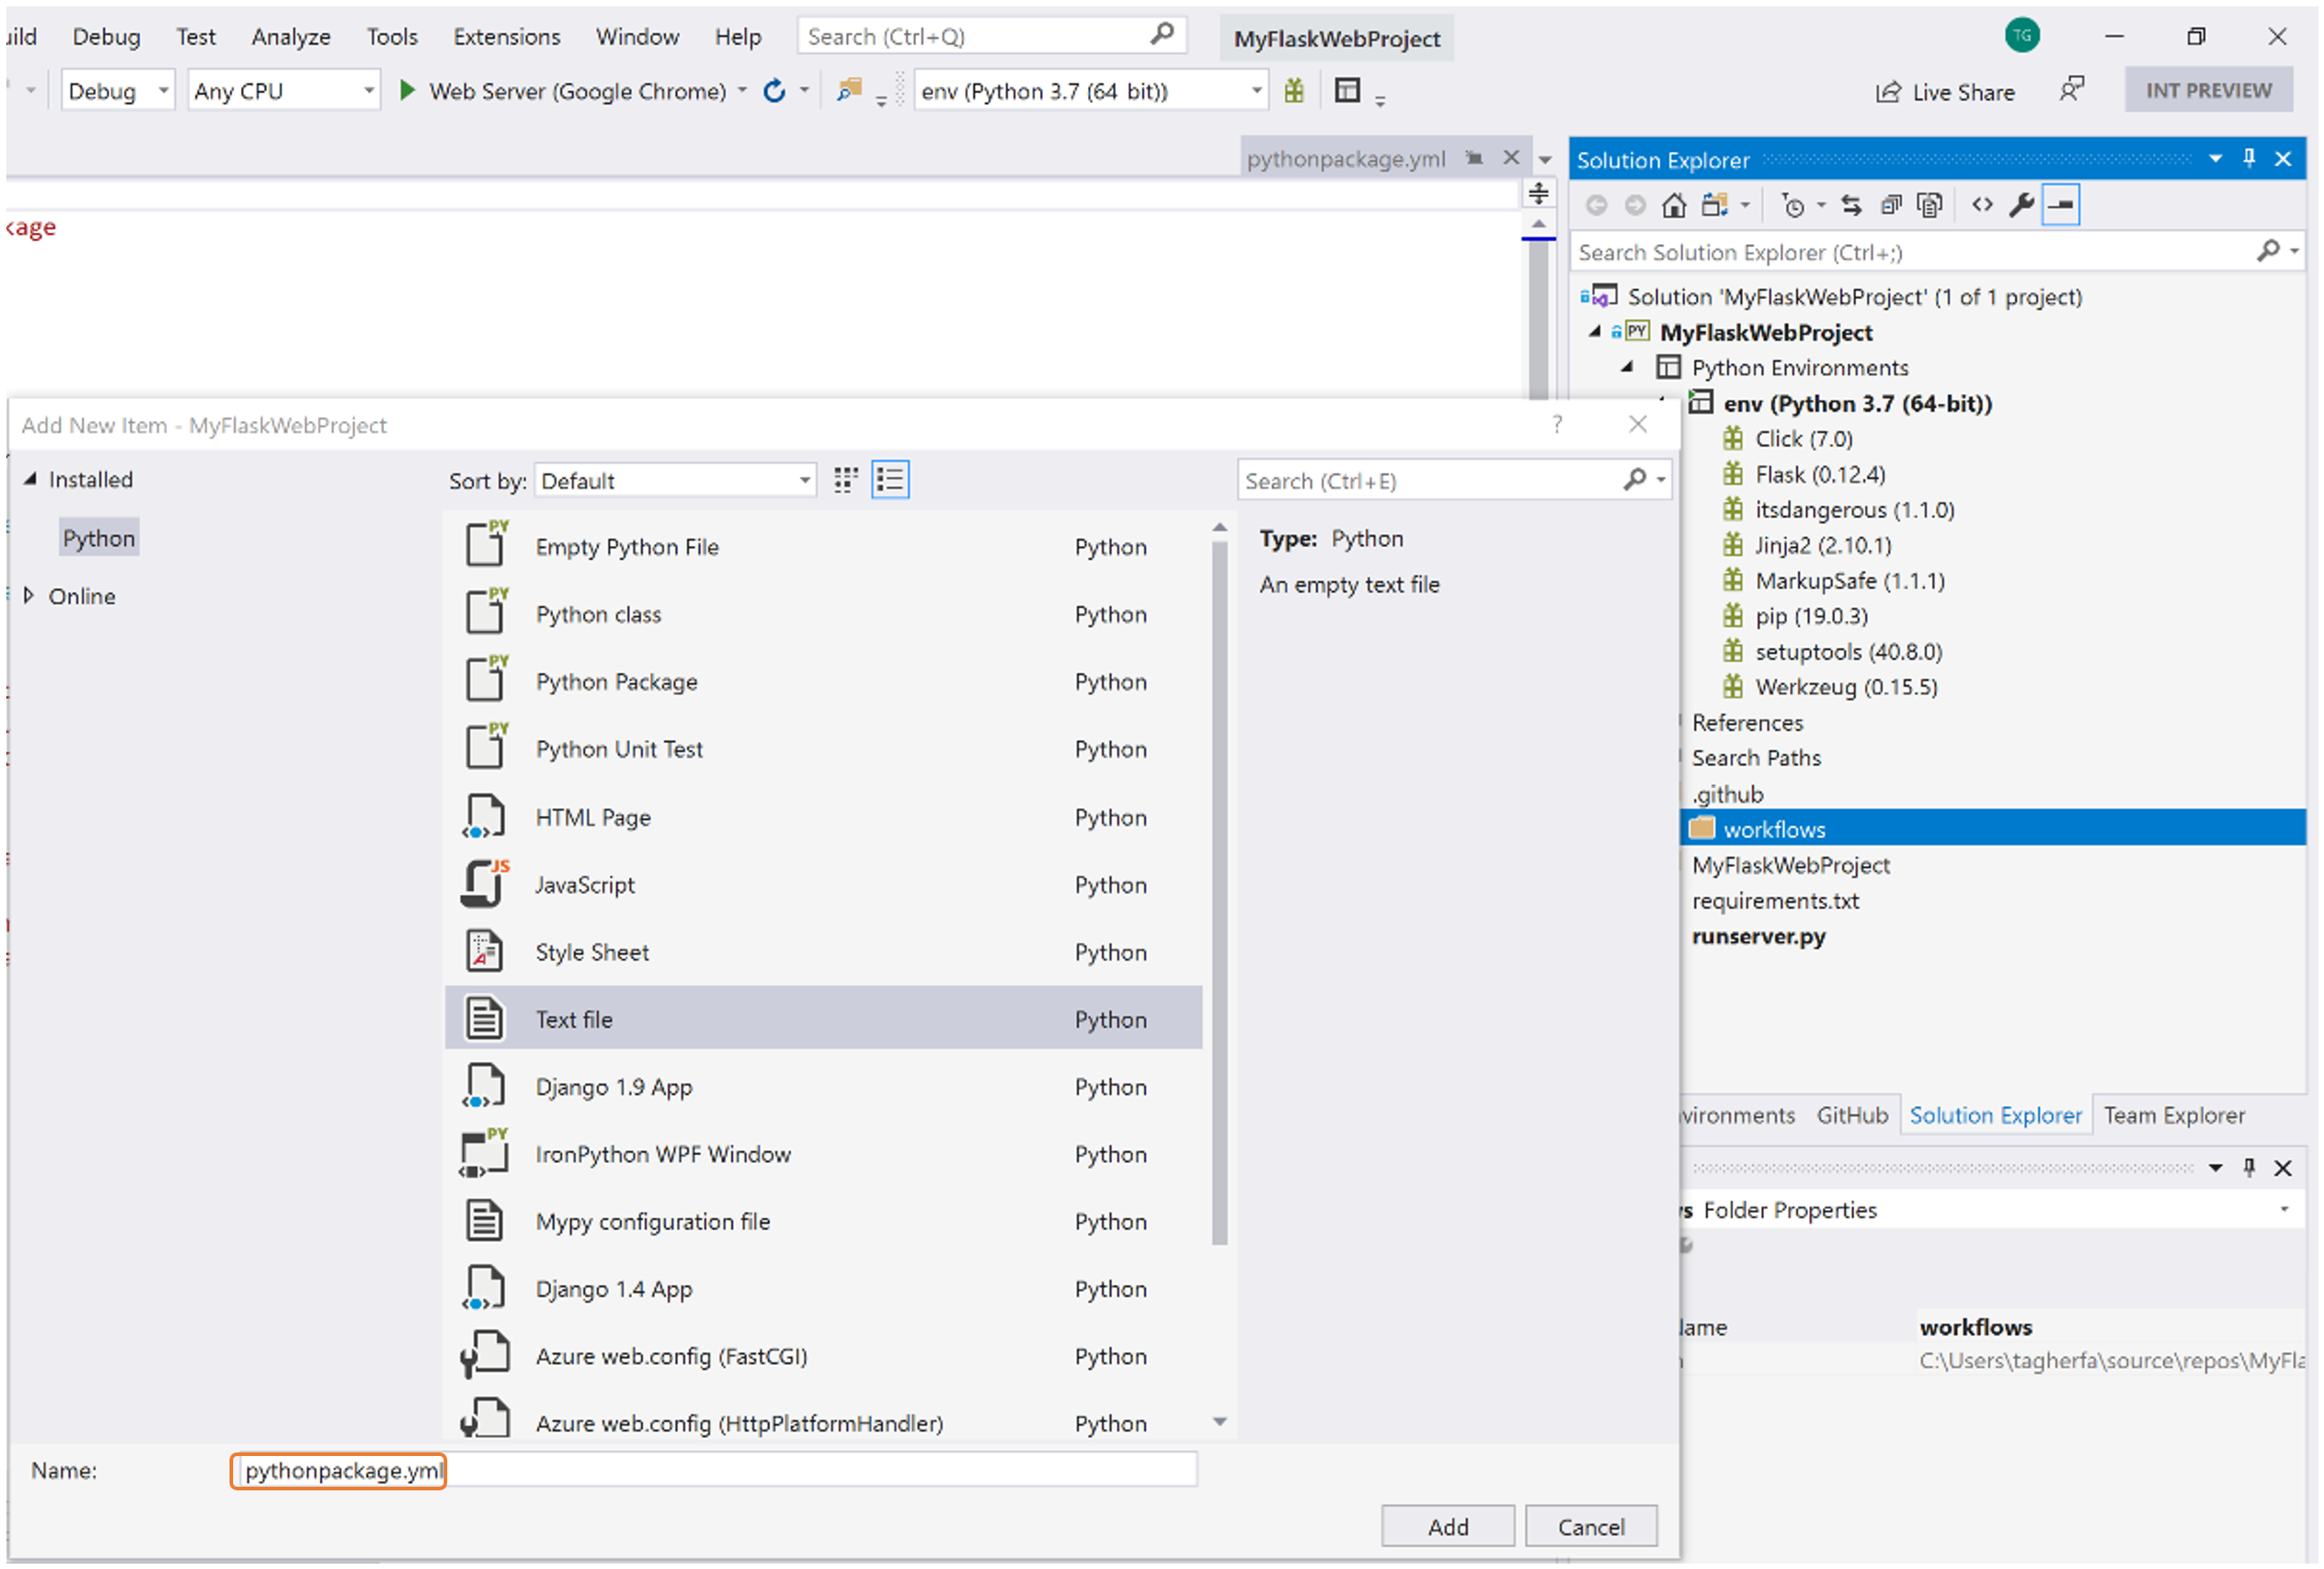
For this tutorial I am using the following basic YAML script that allows us to deploy our Flask web app on the latest version of Ubuntu using four different Python versions. To learn more about writing GitHub Actions take a look at the following two links:
name: Python package

on: [push]

jobs:
  build:

    runs-on: ubuntu-latest
    strategy:
      max-parallel: 4
      matrix:
        python-version: [2.7, 3.5, 3.6, 3.7]

    steps:
    - uses: actions/checkout@master
    - name: Set up Python ${{ matrix.python-version }}
      uses: actions/setup-python@v1
      with:
        version: ${{ matrix.python-version }}
    - name: Install dependencies
      run: |
        python -m pip install --upgrade pip
        pip install -r requirements.txt
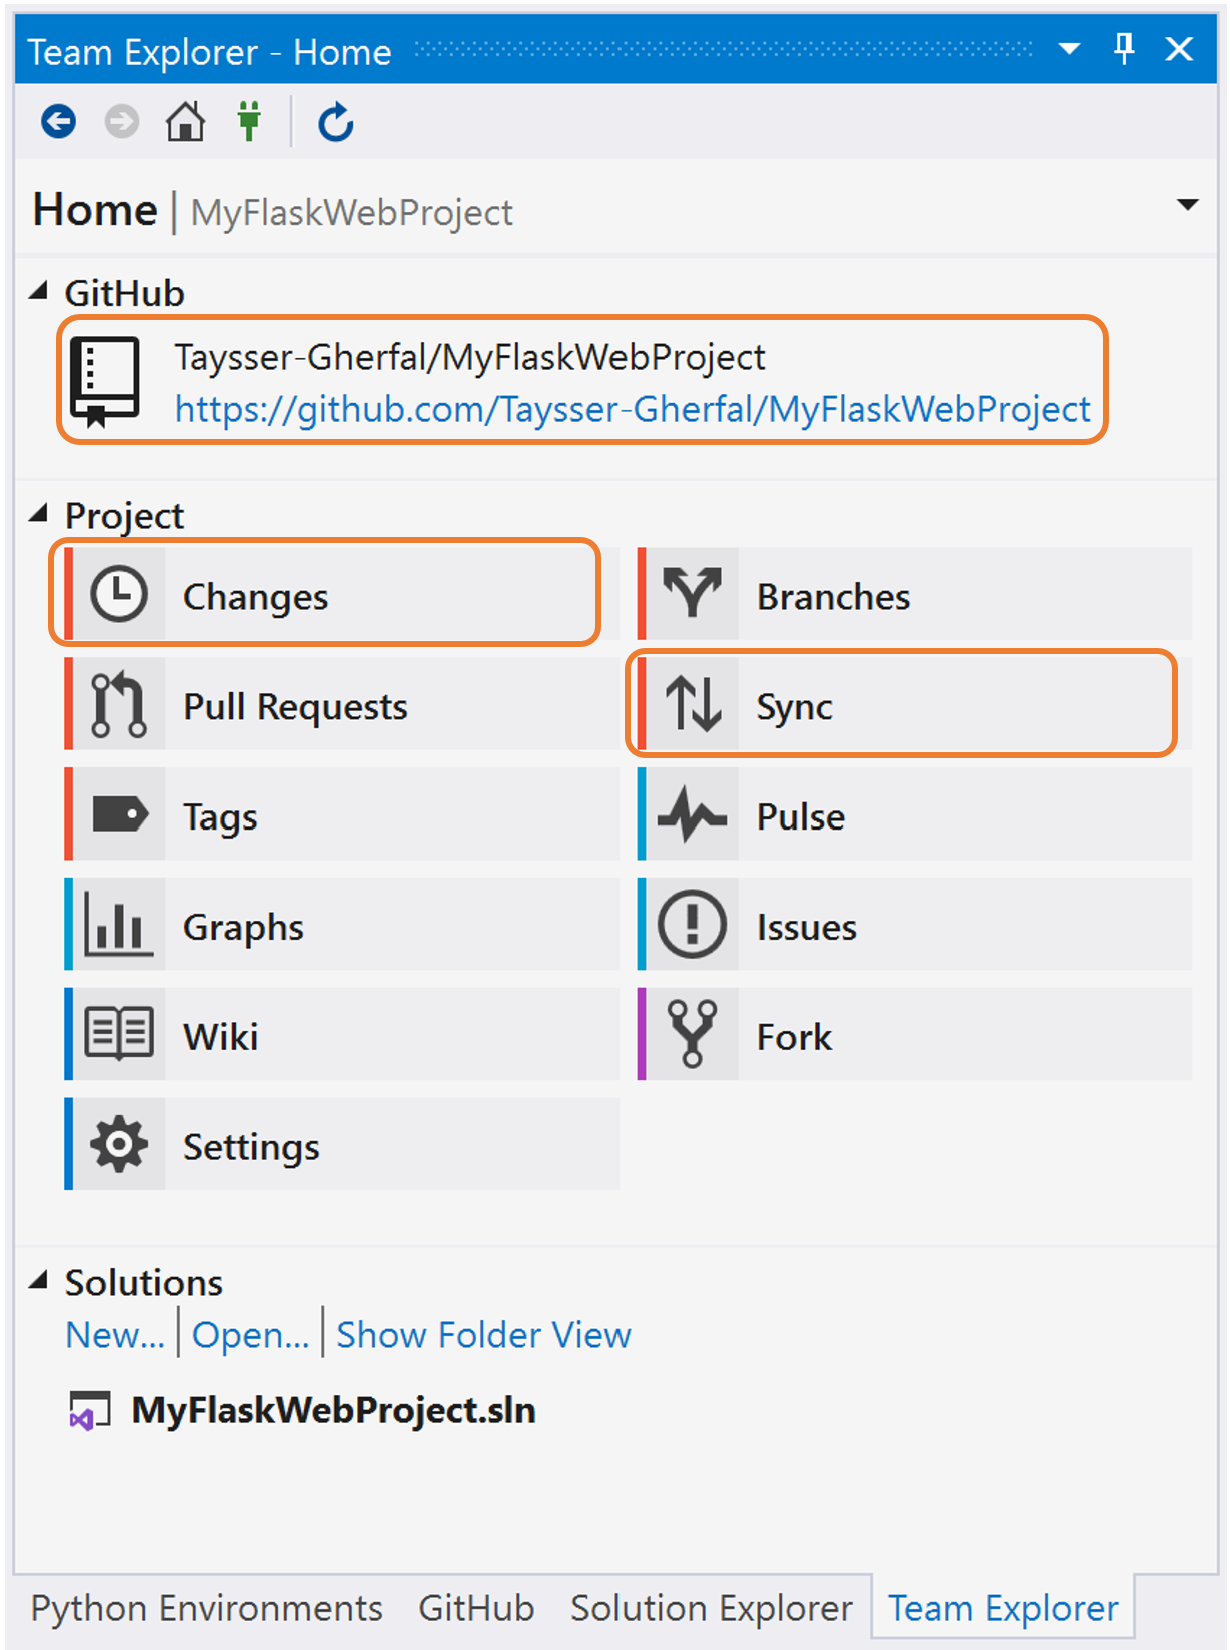
5- After saving your YAML script, make sure to commit and push your changes using Team Explorer’s Changes and Sync. After that visit your GitHub repository by clicking on the URL that shows under the GitHub title as shown below.
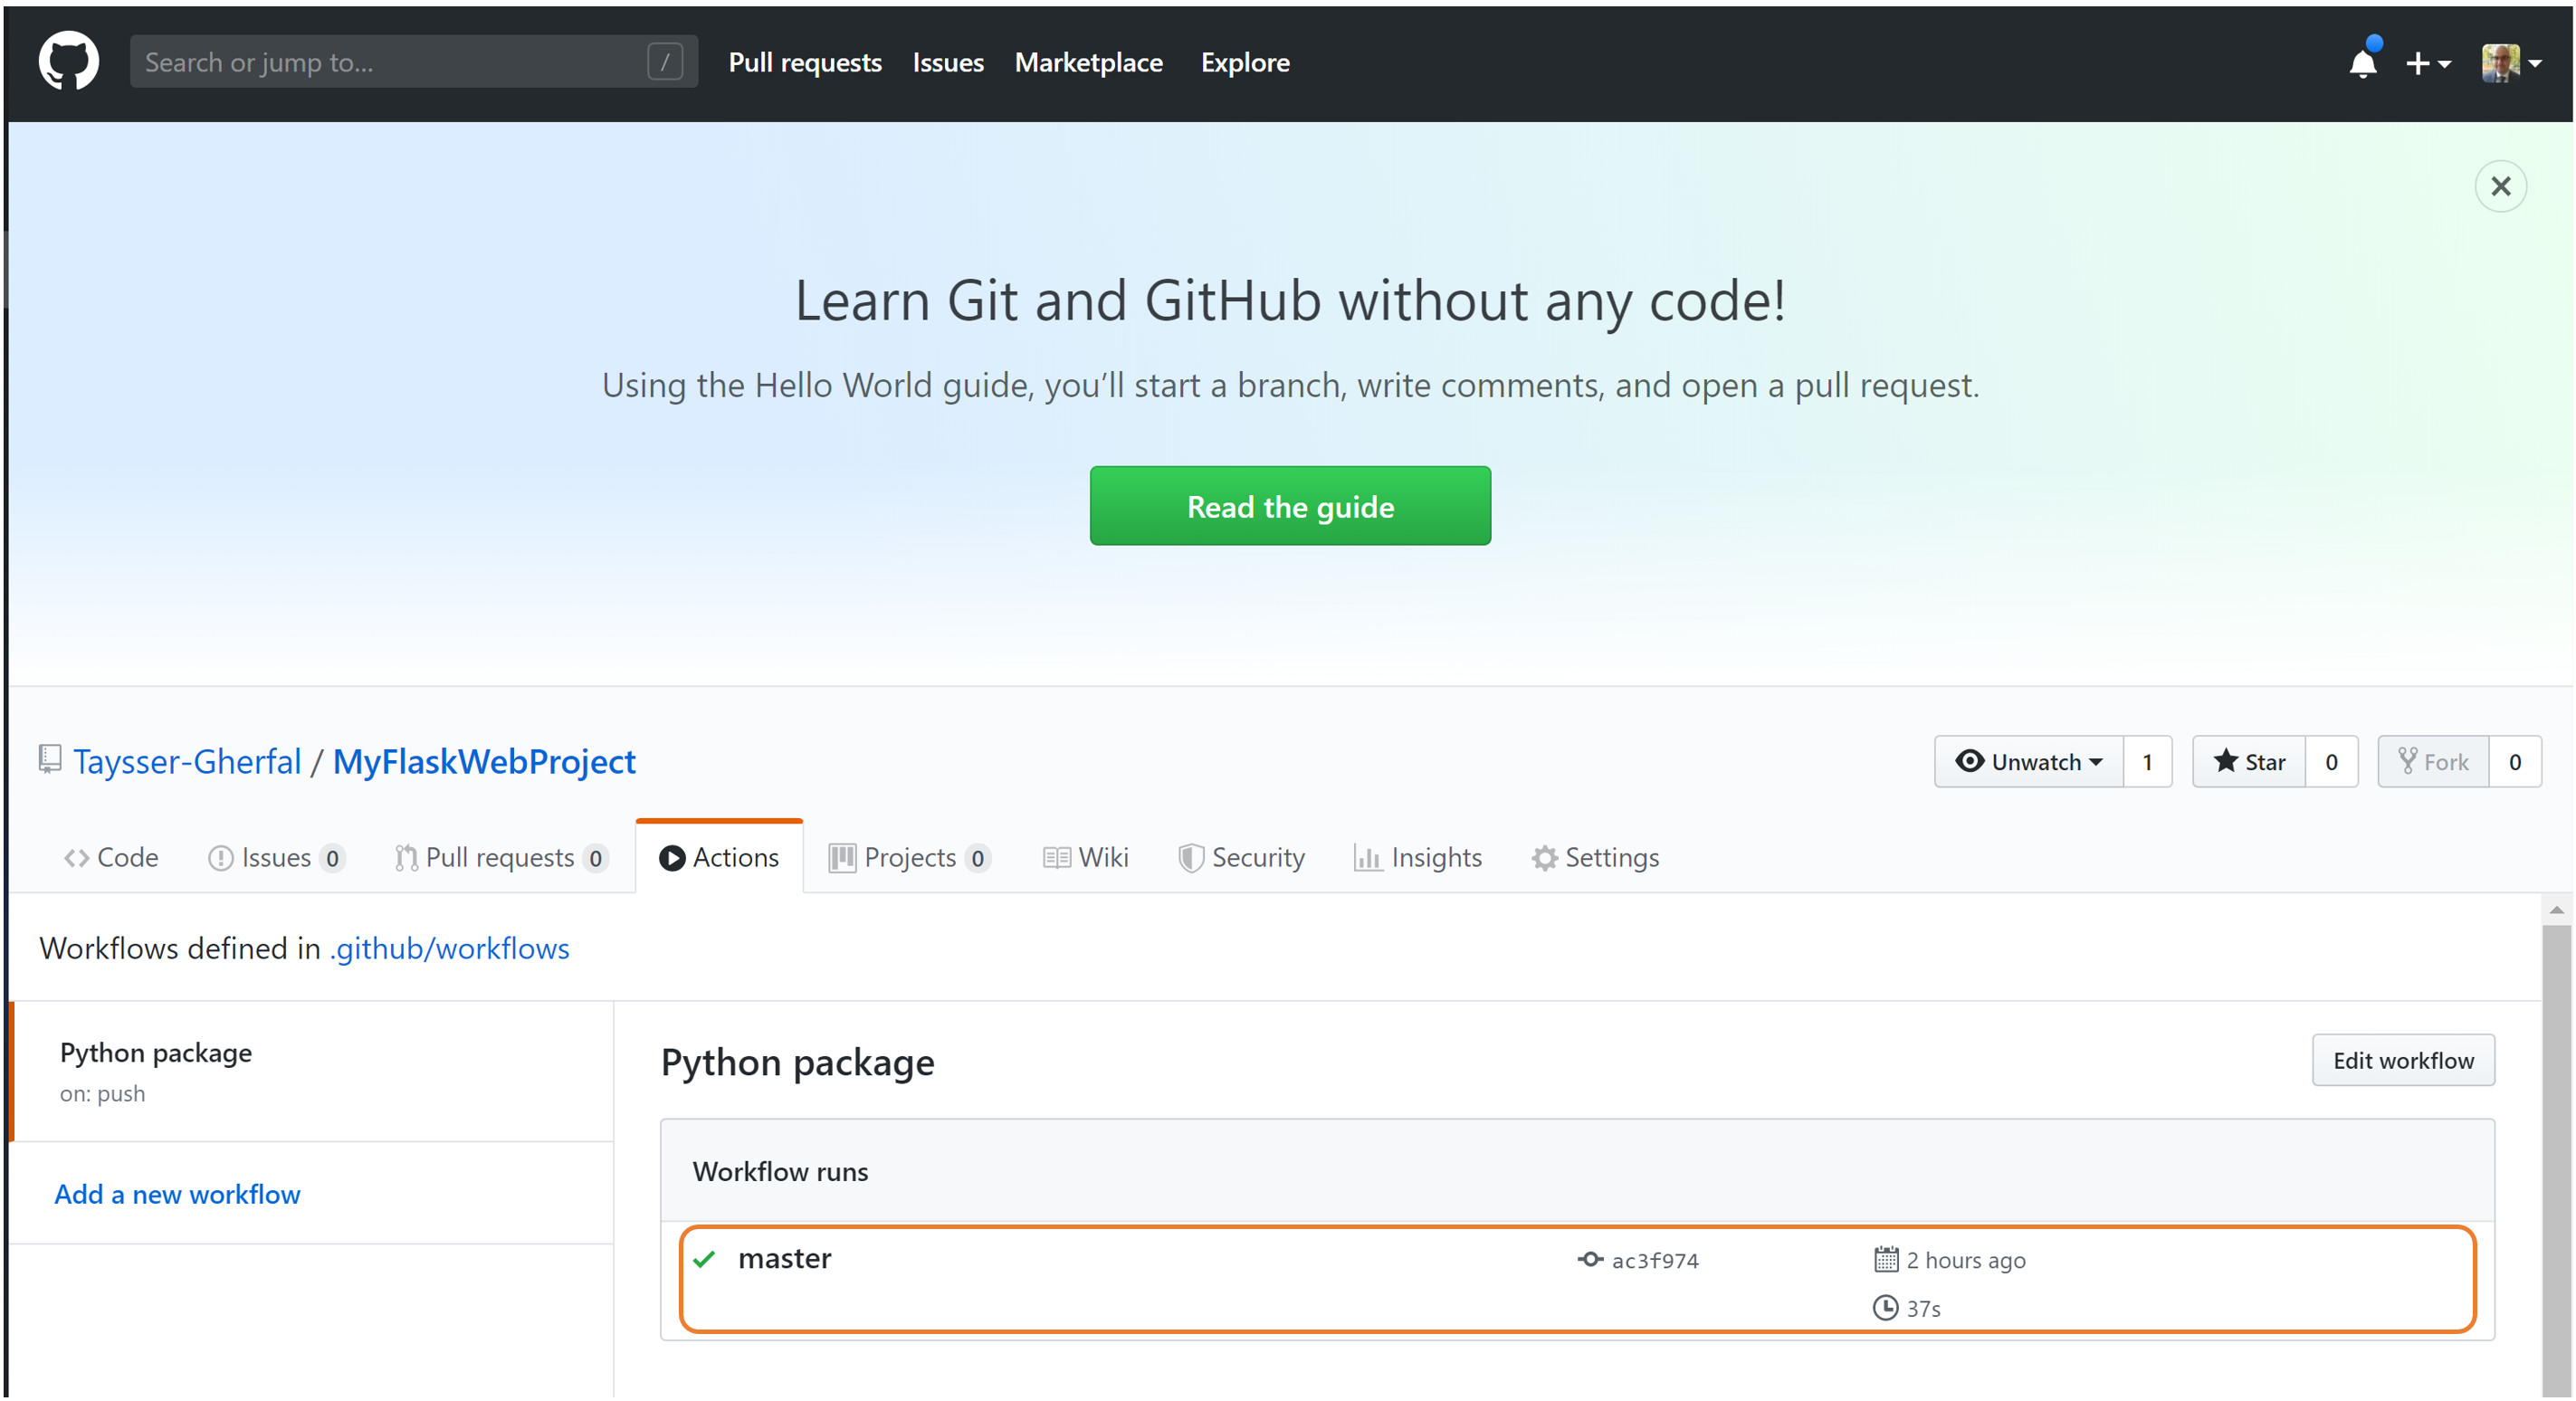
6- On your GitHub repository click on Actions and select your workflow to see more details about your workflow. As you can see below, our code runs successfully on the four different versions of Python.

7- With GitHub Actions you can quickly build, test, and deploy code from GitHub repositories to the cloud with Azure. To do that lets create a new workflow by making an Azure_Deploy.yml file under the same directory .github/workflows as shown below:
on: push

jobs:
  build-and-deploy:
    runs-on: ubuntu-latest
    steps:
    # checkout the repo
    - uses: actions/checkout@master

    # install dependencies, build, and test
    - name: Set up Python ${{ matrix.python-version }}
      uses: actions/setup-python@v1
      with:
        version: ${{ matrix.python-version }}
    - name: Install dependencies
      run: |
        python -m pip install --upgrade pip
        pip install -r requirements.txt

    # deploy web app using publish profile credentials
    - uses: azure/appservice-actions/webapp@master
      with:
        app-name: MyFlaskApp
        publish-profile: ${{ secrets.azureWebAppPublishProfile }}
8- Deploying to Azure requires an Azure account. If you don’t have one, you can get started today with a free Azure account! And follow these steps to configure your deployment credentials:
-
- Download the publish profile for the WebApp from the portal. For more information on how to do that take a look at Create the publish settings file in Azure App Service
- Define a new GitHub secret under your repository settings and paste the contents for the downloaded publish profile file into the secret’s value field. Make sure the title of your secret matches the publish-profile value on your YAML script. In my case it is azureWebAppPublishProfile
9- The last step would be to commit and push your changes using Team Explorer’s Changes and Sync sections as shown on step-5. After that, visit Actions on your GitHub repository to make sure that all of your Actions are working correctly.
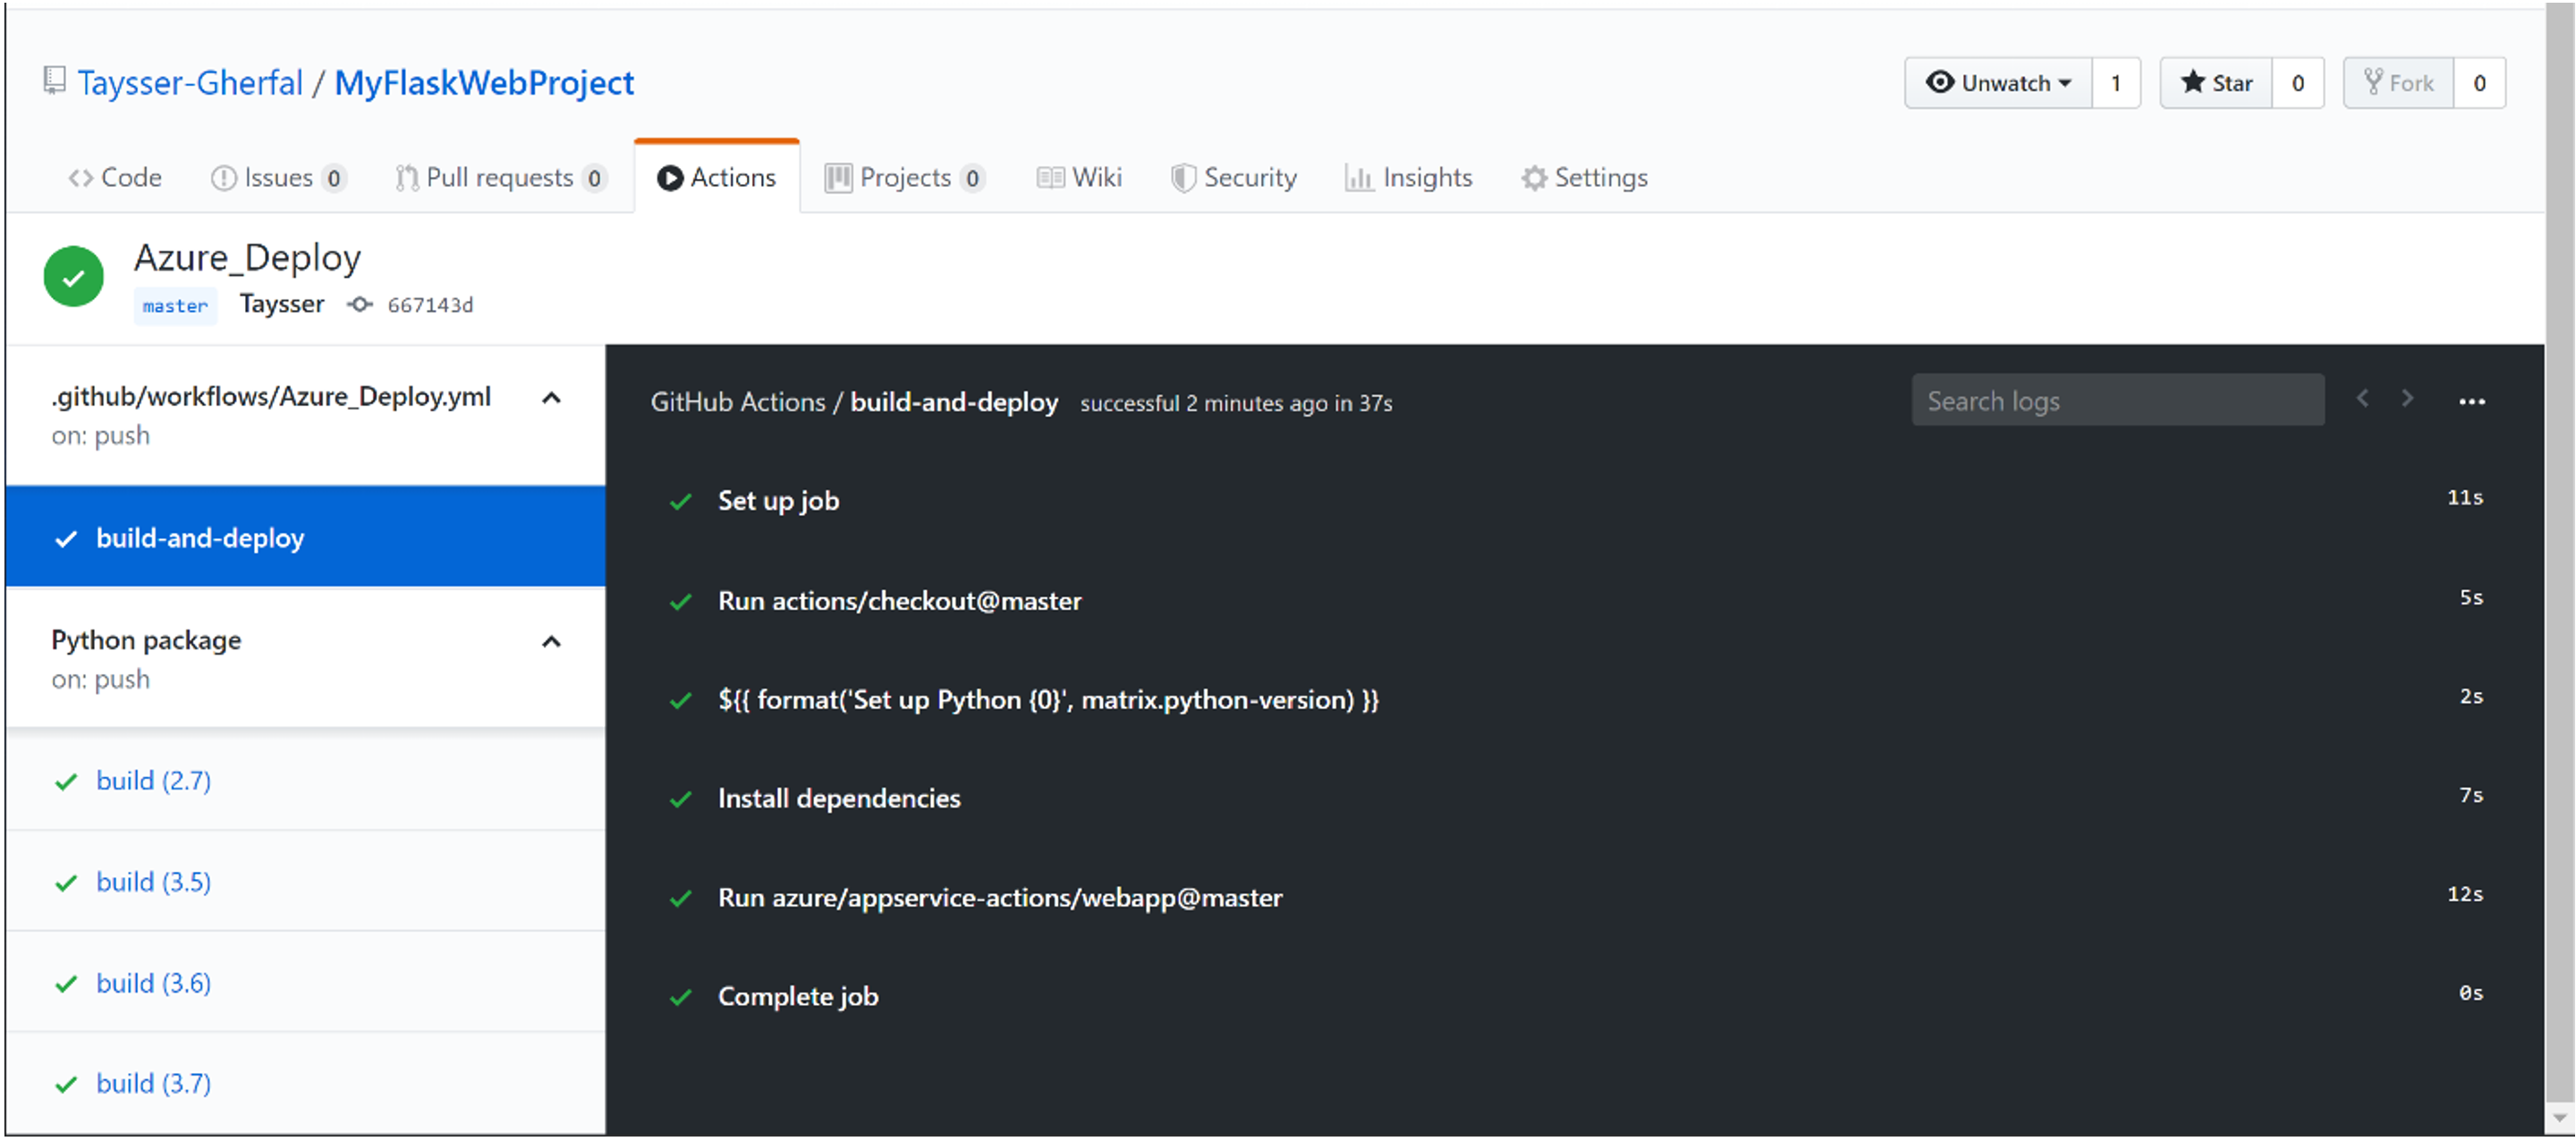
To learn more about deploying your GitHub code to the cloud take a look at the GitHub Actions for Azure blog and try out the GitHub Actions for Azure. If you encounter a problem during the preview, please open an issue on the GitHub repository for the specific action.
We Need Your Feedback!
As always, let us know of any issues you run into by using the Report a Problem tool in Visual Studio. You can also head over to Visual Studio Developer Community to track your issues, suggest a feature, ask questions, and find answers from others. We use your feedback to continue to improve Visual Studio 2019, so thank you again on behalf of our entire team.
The post Getting Started with GitHub Actions in Visual Studio appeared first on The Visual Studio Blog.