Quantcast
Channel: Category Name
Viewing all 5971 articles
Browse latest View live

Azure DevOps Roadmap update for 2019 Q4

$
0
0

Azure DevOps Roadmap update for 2019 Q4

We are continuously investing in Azure DevOps, this quarter we plan to deliver very exciting enhancements and features across our services. The features listed below are a few highlights of what we plan to deliver in Q4. Visit the Features Timeline for a complete look at the list of features for Q4. Each feature links to the public roadmap project where you can find more details about each item.

Azure Boards:

Azure Repos:

Azure Pipelines:

  • General availability of multi-stage pipelines UX

    We’ve had great feedback about multi-stage pipelines since we deployed in May. This quarter we will address some of the key features based on this feedback. The areas that we will improve are logs page and overall navigation. We will also continue to invest in features that get us to parity with classic pipelines by letting you skip stages when you start a manual run. In addition, we will transition to opt-out and general availability.

  • Auditing is now in public preview and we’re continuing to make big investments in this quarter. Specifically:

    Streaming for Azure DevOps Auditing

    We will continue to invest in auditing for pipeline events by building streaming for auditing. Streaming will let you send your auditing events to first- and third-party Security Incident and Event Management (SIEM) tools. The use of these tools along with auditing will allow for anomaly detection, trend visualization, and more! We plan to support streaming connectors for Splunk, Azure Log Analytics (with the ability to connect to Azure Sentinel), and Azure Event Grid.

    Auditing for pipeline events

    In addition, We will make the auditing capabilities in Azure Pipelines stronger by adding audit events for pipelines and releases, like pipeline edited, run started, checks completed, approval completed, stage completed, and more.

    Artifacts events in the auditing service

    Lastly, we will invest in auditing Azure Artifacts. We’ll focus on auditing scenarios around permission changes, feed, upstream, and package create, update, and delete.

  • Pipeline Artifacts GA

    We will release the GA version of Pipeline Artifacts for Azure DevOps Services. Thanks to your feedback during public preview, we fixed issues and further expanded functionality. Pipeline Artifacts uses existing tooling in Azure Pipelines to dramatically reduce the time it takes to store outputs from builds and will officially take the place of Build Artifacts after some transition work. See the Pipelines Artifacts documentation to learn more.

  • Pipeline Caching GA

    This quarter we will officially release the GA version of Pipeline Caching. We will complete work based on the feedback gathered during the preview and make caching efficient and easy to use.

Azure Artifacts:

  • Public feeds GA and project-scoped feed creation UX

    Public feeds general availability brings the ability to add public feeds as upstream sources from other Azure Artifacts feeds. With public feeds, we will also release the UX for creating project-scoped feeds. Project-scoped feeds will be the default for feeds, which will follow the visibility of the parent project. See the feeds documentation for more information.

Administration:

  • Pay for users once per user across organizations under the same Azure subscription

    We have been incrementally rolling out the new per-user billing model over the last 4 months, starting with the transition from monthly to daily billing, and most recently with the change from license purchase to assignment based billing. This quarter we will move out of private preview and enable opt-in to multi-org billing via billing administration.

We appreciate your feedback, which helps us prioritize. If you have new ideas or changes you’d like to see, provide a suggestion on the Developer Community, vote for an existing one, or contact us on Twitter.

The post Azure DevOps Roadmap update for 2019 Q4 appeared first on Azure DevOps Blog.


How Hanu helps bring Windows Server workloads to Azure

$
0
0

For decades our Microsoft services partners have fostered digital transformation at customer organizations around the world. With deep expertise in both on-premises and cloud operating models, our partners are trusted advisers to their customer, helping shape migration decisions. Partners give customers hands-on support with everything from initial strategy to implementation – giving them a unique perspective on why migration matters.

Hanu is one of our premier Microsoft partners and the winner of the 2019 Microsoft Azure Influencer Partner of the Year.  Hanu experts rely on expertise with Windows Server and SQL Server, as well as Azure, to plan and manage cloud migration. This ensures that customers get proactive step-by-step guidance and best in class support as they transform with the cloud. 

Recently, I sat down with Dave Sasson, Chief Strategy Officer at Hanu, to learn more about why Windows Server customers migrate to the cloud, and why they choose Azure. Below I am sharing a few key excerpts.

How often are Windows Server customers considering cloud as a part of their digital strategy today? How are they thinking about migrating business applications?

Very frequently we talk to customers that have Windows Servers running their business-critical apps. For a significant number of custom apps, .NET is the code base.  For the CIOs at these companies, cloud initiatives are their top priorities. In this competitive age, end users are demanding great experiences and our customers are looking at ways to innovate quicker and fail faster. Cloud is the natural choice to deliver these new experiences.

Aging infrastructure that is prone to failure and is vulnerable to security threats are also driving cloud considerations. The recent end of support for SQL Server 2008 and 2008 R2, and the upcoming end of support for Windows Server 2008 and 2008 R2, are decision points for customers on whether to invest in on-premises infrastructure or move their workloads to the cloud.

What are some of the considerations you see Windows Sever customers reviewing when choosing the cloud?

Security, performance and uptime, management, and cost optimization are the top technical considerations mentioned. IT skill is another significant consideration.

Customers want to invest in cloud partners that have technology leadership. This enables customers to modernize their applications and data estates, leverage chatbots, machine learning, and infuse AI services into their internal processes and their customer facing applications.   

What are the challenges you see customers facing when they are transitioning from on-premises to the cloud?

Operating in the cloud is a new paradigm for most customers.  Security, compliance, performance, and uptime are immediate concerns to ensure that companies have business continuity while they digitally transform across the company. Due to recent security threats and compliance requirements, we see this as a concern in not only industry verticals that are traditionally considered highly regulated, but across the board.

Another top challenge for CIOs is how they leverage their organization’s expertise in this new age of IT. Most customer have tons of in-house expertise, but the worry is whether their existing skills will apply when cloud becomes part of their IT environment and keep a high uptime.  

In your experience, why do customers choose Azure for their Windows Server Workloads?

Windows Server and SQL Server users trust Microsoft as their chosen technology partner. Azure offers even better built-in security features and controls to protect cloud environments than what is available on-premises. Azure’s 90+ compliance offerings across the breadth of industry verticals help customers quickly move to a compliant state while running in the cloud. The Azure Governance application also helps automate compliance tracking.

"We worked with Hanu to move our business-critical workloads running on Windows Sever to VMs in Azure. We are saving approximately 30% in cost and best of all, we can now focus entirely on innovation." Paul Athaide, Senior Manager, Multiple Sclerosis Society of Canada

Azure offers first party support for Windows Sever and SQL Server. This means the support team is backed by experts that built Windows Server and SQL server. Azure’s First party support promise combined with Hanu’s world class ISO-27001 certified NOC and SOC standards give customers the confidence that they can run business critical apps in Azure. 

Every customer operates their on-premises environment while they build out their operating environment in the cloud. Azure offers tools for Windows Server admins such as Windows Admin Center to manage their on-premises workloads and their Azure VMs. Many Azure services such as Azure Security Center, Update, Monitoring, Site Recovery and Backup work on-premises and are available through Windows Admin Center. Secondly, Azure Services like Azure SQL Database, App Service, and Azure Kubernetes service natively run Windows applications.

Lastly, we tell all our customers to take advantage of Azure Hybrid Benefit. If they have Software Assurance, they can save significantly on cloud cost by moving their Windows and SQL Server workloads to Azure. 

How does Hanu see the value in building a practice in migrating Windows Server on-premises workloads to the cloud?

Customers who are running Windows Server and SQL Server on-premises today have a greater understanding for and confidence in the cloud. We are frequently being pulled into discussions to assist in building customers environments in Azure. Consequently, we have invested a lot of time and resources in our Windows Server migration practice. As a Microsoft Partner, we are excited to see the innovations that Azure is bringing and ways we can help our customers digitally transform their business. 

Dave, thanks so much for sitting down with me. It sounds like our customers are in good hands! 

It’s always great to hear from our premier partners on what challenges customers face and how Microsoft Azure meets those requirements. 

Please check out the Partner Portal to find partners that meet your requirements. We realize every customer has challenges that are unique to their business and our Microsoft Partner Network has 1000’s of partners that meet those requirements. To learn more about Hanu, try Hanu's solution available on Azure Marketplace. 

TensorFlow 2.0 on Azure: Fine-tuning BERT for question tagging

$
0
0

This post is co-authored by Abe Omorogbe, Program Manager, Azure Machine Learning, and John Wu, Program Manager, Azure Machine Learning

Congratulations to the TensorFlow community on the release of TensorFlow 2.0! In this blog, we aim to highlight some of the ways that Azure can streamline the building, training, and deployment of your TensorFlow model. In addition to reading this blog, check out the demo discussed in more detail below, showing how you can use TensorFlow 2.0 in Azure to fine-tune a BERT (Bidirectional Encoder Representations from Transformers) model for automatically tagging questions.

TensorFlow 1.x is a powerful framework that enables practitioners to build and run deep learning models at massive scale. TensorFlow 2.0 builds on the capabilities of TensorFlow 1.x by integrating more tightly with Keras (a library for building neural networks), enabling eager mode by default, and implementing a streamlined API surface.

TensorFlow 2.0 on Azure

We've integrated Tensorflow 2.0 with the Azure Machine Learning service to make bringing your TensorFlow workloads into Azure as seamless as possible. Azure Machine Learning service provides an SDK that lets you write machine learning models in your preferred framework and run them on the compute target of your choice, including a single virtual machine (VM) in Azure, a GPU (graphics processing unit) cluster in Azure, or your local machine. The Azure Machine Learning SDK for Python has a dedicated TensorFlow estimator that makes it easy to run TensorFlow training scripts on any compute target you choose.

In addition, the Azure Machine Learning service Notebook VM comes with TensorFlow 2.0 pre-installed, making it easy to run Jupyter notebooks that use TensorFlow 2.0.

TensorFlow 2.0 on Azure demo: Automated labeling of questions with TF 2.0, Azure, and BERT

As we’ve mentioned, TensorFlow 2.0 makes it easy to get started building deep learning models. Using TensorFlow 2.0 on Azure makes it easy to get the performance benefits of Microsoft’s global, enterprise-grade cloud for whatever your application may be.

To highlight the end-to-end use of TensorFlow 2.0 in Azure, we prepared a workshop that will be delivered at TensorFlow World, on using TensorFlow 2.0 to train a BERT model to suggest tags for questions that are asked online. Check out the full GitHub repository, or go through the higher-level overview below.

Demo Goal

In keeping with Microsoft’s emphasis on customer obsession, Azure engineering teams try to help answer user questions on online forums. Azure teams can only answer questions if we know that they exist, and one of the ways we are alerted to new questions is by watching for user-applied tags. Users might not always know the best tag to apply to a given question, so it would be helpful to have an AI agent to automatically suggest good tags for new questions.

We aim to train an AI agent to automatically tag new Azure-related questions.

Training

First, check out the training notebook. After preparing our data in Azure Databricks, we train a Keras model on an Azure GPU cluster using the Azure Machine Learning service TensorFlow Estimator class. Notice how easy it is to integrate Keras, TensorFlow, and Azure’s compute infrastructure. We can easily monitor the progress of training with the run object.

Inferencing

Next, open up the inferencing notebook. Azure makes it simple to deploy your trained TensorFlow 2.0 model as a REST endpoint in order to get tags associated with new questions.

Machine Learning Operations

Next, open up the Machine Learning Operations instructions. If we intend to use the model in a production setting, we can bring additional robustness to the pipeline with ML Ops, an offering by Microsoft that brings a DevOps mindset to machine learning, enabling multiple data scientists to work on the same model while ensuring that only models that meet certain criteria will be put into production.

Next steps

TensorFlow 2.0 opens up exciting new horizons for practitioners of deep learning, both old and new. If you would like to get started, check out the following resources:


Enabling Diagnostic Logging in Azure API for FHIR®

$
0
0

Access to Diagnostic Logs is essential for any healthcare service where being compliant with regulatory requirements (like HIPAA) is a must. The feature in Azure API for FHIR that makes this happen is Diagnostic settings in the Azure Portal UI. For details on how Azure Diagnostic Logs work, please refer to the Azure Diagnostic Log documentation.

At this time, service is emitting the following fields in the Audit Log: 

Field Name 

Type  

Notes
TimeGenerated DateTime Date and Time of the event.

OperationName   

String  
CorrelationId   String  
RequestUri   String The request URI.
FhirResourceType   String The resource type the operation was executed for.
StatusCode   Int   The HTTP status code (e.g., 200).
ResultType   String   The available value currently are ‘Started’, ‘Succeeded’, or ‘Failed.’
OperationDurationMs Int   The milliseconds it took to complete the request.
LogCategory   String The log category. We are currently emitting 'AuditLogs' for the value.
CallerIPAddress   String The caller's IP address.
CallerIdentityIssuer   String   Issuer
CallerIdentityObjectId   String   Object_Id
CallerIdentity   Dynamic   A generic property bag containing identity information.
Location   String The location of the server that processed the request (e.g., South Central US).

How do I get to my Audit Logs?

To enable diagnostic logging in Azure API for FHIR, navigate to Diagnostic settings in the Azure Portal. Here you will see standard UI that all services use for emitting diagnostic logging.

Diagnostic Settings

There are three ways to get to the diagnostic:

  • Archive to the Storage Account for auditing or manual inspection.
  • Stream to Event Hub for ingestion by third-party service or custom analytics solutions, such as Power BI.
  • Stream to Log Analytics workspace in Azure Monitor.

Please note, it may take up to 15 minutes for the first Logs to show in Log Analytics.

For more information on how to work with Diagnostic Logs, please refer to Diagnostic Logs documentation.

Conclusion

Having access to Diagnostic Logs is essential for monitoring service and providing compliance reports. Azure API for FHIR allows you to do this through Diagnostic Logs.

FHIR® is the registered trademark of HL7 and is used with the permission of HL7.

The new Microsoft Project rolls out to customers worldwide

New in Stream Analytics: Machine Learning, online scaling, custom code, and more

$
0
0

Azure Stream Analytics is a fully managed Platform as a Service (PaaS) that supports thousands of mission-critical customer applications powered by real-time insights. Out-of-the-box integration with numerous other Azure services enables developers and data engineers to build high-performance, hot-path data pipelines within minutes. The key tenets of Stream Analytics include Ease of use, Developer productivity, and Enterprise readiness. Today, we're announcing several new features that further enhance these key tenets. Let's take a closer look at these features:

Preview Features

Rollout of these preview features begins November 4th, 2019. Worldwide availability to follow in the weeks after. 

Online scaling

In the past, changing Streaming Units (SUs) allocated for a Stream Analytics job required users to stop and restart. This resulted in extra overhead and latency, even though it was done without any data loss.

With online scaling capability, users will no longer be required to stop their job if they need to change the SU allocation. Users can increase or decrease the SU capacity of a running job without having to stop it. This builds on the customer promise of long-running mission-critical pipelines that Stream Analytics offers today.

Change SUs on a Stream Analytics job while it is running

Change SUs on a Stream Analytics job while it is running.

C# custom de-serializers

Azure Stream Analytics has always supported input events in JSON, CSV, or AVRO data formats out of the box. However, millions of IoT devices are often programmed to generate data in other formats to encode structured data in a more efficient yet extensible format.

With our current innovations, developers can now leverage the power of Azure Stream Analytics to process data in Protobuf, XML, or any custom format. You can now implement custom de-serializers in C#, which can then be used to de-serialize events received by Azure Stream Analytics.

Extensibility with C# custom code

Azure Stream Analytics traditionally offered SQL language for performing transformations and computations over streams of events. Though there are many powerful built-in functions in the currently supported SQL language, there are instances where a SQL-like language doesn't provide enough flexibility or tooling to tackle complex scenarios.

Developers creating Stream Analytics modules in the cloud or on IoT Edge can now write or reuse custom C# functions and invoke them right in the query through User Defined Functions. This enables scenarios such as complex math calculations, importing custom ML models using ML.NET, and programming custom data imputation logic. Full-fidelity authoring experience is made available in Visual Studio for these functions.

Managed Identity authentication with Power BI

Dynamic dashboarding experience with Power BI is one of the key scenarios that Stream Analytics helps operationalize for thousands of customers worldwide.

Azure Stream Analytics now offers full support for Managed Identity based authentication with Power BI for dynamic dashboarding experience. This helps customers align better with their organizational security goals, deploy their hot-path pipelines using Visual Studio CI/CD tooling, and enables long-running jobs as users will no longer be required to change passwords every 90 days.

While this new feature is going to be immediately available, customers will continue to have the option of using the Azure Active Directory User-based authentication model.

Stream Analytics on Azure Stack

Azure Stream Analytics is supported on Azure Stack via IoT Edge runtime. This enables scenarios where customers are constrained by compliance or other reasons from moving data to the cloud, but at the same time wish to leverage Azure technologies to deliver a hybrid data analytics solution at the Edge.

Rolling out as a preview option beginning January 2020, this will offer customers the ability to analyze ingress data from Event Hubs or IoT Hub on Azure Stack, and egress the results to a blob storage or SQL database on the same. You can continue to sign up for preview of this feature until then.

Debug query steps in Visual Studio

We've heard a lot of user feedback about the challenge of debugging the intermediate row set defined in a WITH statement in Azure Stream Analytics query. Users can now easily preview the intermediate row set on a data diagram when doing local testing in Azure Stream Analytics tools for Visual Studio. This feature can greatly help users to breakdown their query and see the result step-by-step when fixing the code.

Local testing with live data in Visual Studio Code

When developing an Azure Stream Analytics job, developers have expressed a need to connect to live input to visualize the results. This is now available in Azure Stream Analytics tools for Visual Studio Code, a lightweight, free, and cross-platform editor. Developers can test their query against live data on their local machine before submitting the job to Azure. Each testing iteration takes less than two to three seconds on average, resulting in a very efficient development process.

Live Data Testing feature in Visual Studio Code

Live Data Testing feature in Visual Studio Code

Private preview for Azure Machine Learning

Real-time scoring with custom Machine Learning models

Azure Stream Analytics now supports high-performance, real-time scoring by leveraging custom pre-trained Machine Learning models managed by the Azure Machine Learning service, and hosted in Azure Kubernetes Service (AKS) or Azure Container Instances (ACI), using a workflow that requires users to write absolutely no code.

Users can build custom models by using any popular python libraries such as Scikit-learn, PyTorch, TensorFlow, and more to train their models anywhere, including Azure Databricks, Azure Machine Learning Compute, and HD Insight. Once deployed in Azure Kubernetes Service or Azure Container Instances clusters, users can use Azure Stream Analytics to surface all endpoints within the job itself. Users simply navigate to the functions blade within an Azure Stream Analytics job, pick the Azure Machine Learning function option, and tie it to one of the deployments in the Azure Machine Learning workspace.

Advanced configurations, such as the number of parallel requests sent to Azure Machine Learning endpoint, will be offered to maximize the performance.

You can sign up for preview of this feature now.

Feedback and engagement

Engage with us and get early glimpses of new features by following us on Twitter at @AzureStreaming.

The Azure Stream Analytics team is highly committed to listening to your feedback and letting the user's voice influence our future investments. We welcome you to join the conversation and make your voice heard via our UserVoice page.

Windows 10 SDK Preview Build 19008 available now!

$
0
0

Today, we released a new Windows 10 Preview Build of the SDK to be used in conjunction with Windows 10 Insider Preview (Build 19008 or greater). The Preview SDK Build 19008 contains bug fixes and under development changes to the API surface area.

The Preview SDK can be downloaded from developer section on Windows Insider.

For feedback and updates to the known issues, please see the developer forum. For new developer feature requests, head over to our Windows Platform UserVoice.

Things to note:

  • This build works in conjunction with previously released SDKs and Visual Studio 2017 and 2019. You can install this SDK and still also continue to submit your apps that target Windows 10 build 1903 or earlier to the Microsoft Store.
  • The Windows SDK will now formally only be supported by Visual Studio 2017 and greater. You can download the Visual Studio 2019 here.
  • This build of the Windows SDK will install on only on Windows 10 Insider Preview builds.
  • In order to assist with script access to the SDK, the ISO will also be able to be accessed through the following static URL: https://software-download.microsoft.com/download/sg/Windows_InsiderPreview_SDK_en-us_19008_1.iso.

Tools Updates

Message Compiler (mc.exe)

  • Now detects the Unicode byte order mark (BOM) in .mc files. If the If the .mc file starts with a UTF-8 BOM, it will be read as a UTF-8 file. Otherwise, if it starts with a UTF-16LE BOM, it will be read as a UTF-16LE file. If the -u parameter was specified, it will be read as a UTF-16LE file. Otherwise, it will be read using the current code page (CP_ACP).
  • Now avoids one-definition-rule (ODR) problems in MC-generated C/C++ ETW helpers caused by conflicting configuration macros (e.g. when two .cpp files with conflicting definitions of MCGEN_EVENTWRITETRANSFER are linked into the same binary, the MC-generated ETW helpers will now respect the definition of MCGEN_EVENTWRITETRANSFER in each .cpp file instead of arbitrarily picking one or the other).

Windows Trace Preprocessor (tracewpp.exe)

  • Now supports Unicode input (.ini, .tpl, and source code) files. Input files starting with a UTF-8 or UTF-16 byte order mark (BOM) will be read as Unicode. Input files that do not start with a BOM will be read using the current code page (CP_ACP). For backwards-compatibility, if the -UnicodeIgnore command-line parameter is specified, files starting with a UTF-16 BOM will be treated as empty.
  • Now supports Unicode output (.tmh) files. By default, output files will be encoded using the current code page (CP_ACP). Use command-line parameters -cp:UTF-8 or -cp:UTF-16 to generate Unicode output files.
  • Behavior change: tracewpp now converts all input text to Unicode, performs processing in Unicode, and converts output text to the specified output encoding. Earlier versions of tracewpp avoided Unicode conversions and performed text processing assuming a single-byte character set. This may lead to behavior changes in cases where the input files do not conform to the current code page. In cases where this is a problem, consider converting the input files to UTF-8 (with BOM) and/or using the -cp:UTF-8 command-line parameter to avoid encoding ambiguity.

TraceLoggingProvider.h

  • Now avoids one-definition-rule (ODR) problems caused by conflicting configuration macros (e.g. when two .cpp files with conflicting definitions of TLG_EVENT_WRITE_TRANSFER are linked into the same binary, the TraceLoggingProvider.h helpers will now respect the definition of TLG_EVENT_WRITE_TRANSFER in each .cpp file instead of arbitrarily picking one or the other).
  • In C++ code, the TraceLoggingWrite macro has been updated to enable better code sharing between similar events using variadic templates.

Signing your apps with Device Guard Signing

  • We are making it easier for you to sign your app. Device Guard signing is a Device Guard feature that is available in Microsoft Store for Business and Education. Signing allows enterprises to guarantee every app comes from a trusted source. Our goal is to make signing your MSIX package easier. Documentation on Device Guard Signing can be found here: https://docs.microsoft.com/windows/msix/package/signing-package-device-guard-signing

Windows SDK Flight NuGet Feed

We have stood up a NuGet feed for the flighted builds of the SDK. You can now test preliminary builds of the Windows 10 WinRT API Pack, as well as a microsoft.windows.sdk.headless.contracts NuGet package.

We use the following feed to flight our NuGet packages.

Microsoft.Windows.SDK.Contracts which can be used with to add the latest Windows Runtime APIs support to your .NET Framework 4.5+ and .NET Core 3.0+ libraries and apps.

The Windows 10 WinRT API Pack enables you to add the latest Windows Runtime APIs support to your .NET Framework 4.5+ and .NET Core 3.0+ libraries and apps.

Microsoft.Windows.SDK.Headless.Contracts provides a subset of the Windows Runtime APIs for console apps excludes the APIs associated with a graphical user interface. This NuGet is used in conjunction with Windows ML container development. Check out the Getting Started guide for more information.

Breaking Changes

Removal of api-ms-win-net-isolation-l1-1-0.lib

In this release api-ms-win-net-isolation-l1-1-0.lib has been removed from the Windows SDK. Apps that were linking against api-ms-win-net-isolation-l1-1-0.lib can switch to OneCoreUAP.lib as a replacement.

Removal of IRPROPS.LIB

In this release, irprops.lib has been removed from the Windows SDK. Apps that were linking against irprops.lib can switch to bthprops.lib as a drop-in replacement.

Removal of WUAPICommon.H and WUAPICommon.IDL

In this release we have moved ENUM tagServerSelection from WUAPICommon.H to wupai.h and removed the header. If you would like to use the ENUM tagServerSelection, you will need to include wuapi.h or wuapi.idl.

API Updates, Additions and Removals

The following APIs have been added to the platform since the release of Windows 10 SDK, version 1903, build 18362.

Additions:


namespace Windows.AI.MachineLearning {
  public sealed class LearningModelSessionOptions {
    bool CloseModelOnSessionCreation { get; set; }
  }
}
namespace Windows.ApplicationModel {
  public sealed class AppInfo {
    public static AppInfo Current { get; }
    Package Package { get; }
    public static AppInfo GetFromAppUserModelId(string appUserModelId);
    public static AppInfo GetFromAppUserModelIdForUser(User user, string appUserModelId);
  }
  public interface IAppInfoStatics
  public sealed class Package {
    StorageFolder EffectiveExternalLocation { get; }
    string EffectiveExternalPath { get; }
    string EffectivePath { get; }
    string InstalledPath { get; }
    bool IsStub { get; }
    StorageFolder MachineExternalLocation { get; }
    string MachineExternalPath { get; }
    string MutablePath { get; }
    StorageFolder UserExternalLocation { get; }
    string UserExternalPath { get; }
    IVectorView<AppListEntry> GetAppListEntries();
    RandomAccessStreamReference GetLogoAsRandomAccessStreamReference(Size size);
  }
}
namespace Windows.ApplicationModel.AppService {
  public enum AppServiceConnectionStatus {
    AuthenticationError = 8,
    DisabledByPolicy = 10,
    NetworkNotAvailable = 9,
    WebServiceUnavailable = 11,
  }
  public enum AppServiceResponseStatus {
    AppUnavailable = 6,
    AuthenticationError = 7,
    DisabledByPolicy = 9,
    NetworkNotAvailable = 8,
    WebServiceUnavailable = 10,
  }
  public enum StatelessAppServiceResponseStatus {
    AuthenticationError = 11,
    DisabledByPolicy = 13,
    NetworkNotAvailable = 12,
    WebServiceUnavailable = 14,
  }
}
namespace Windows.ApplicationModel.Background {
  public sealed class BackgroundTaskBuilder {
    void SetTaskEntryPointClsid(Guid TaskEntryPoint);
  }
  public sealed class BluetoothLEAdvertisementPublisherTrigger : IBackgroundTrigger {
    bool IncludeTransmitPowerLevel { get; set; }
    bool IsAnonymous { get; set; }
    IReference<short> PreferredTransmitPowerLevelInDBm { get; set; }
    bool UseExtendedFormat { get; set; }
  }
  public sealed class BluetoothLEAdvertisementWatcherTrigger : IBackgroundTrigger {
    bool AllowExtendedAdvertisements { get; set; }
  }
}
namespace Windows.ApplicationModel.ConversationalAgent {
  public sealed class ActivationSignalDetectionConfiguration
  public enum ActivationSignalDetectionTrainingDataFormat
  public sealed class ActivationSignalDetector
  public enum ActivationSignalDetectorKind
  public enum ActivationSignalDetectorPowerState
  public sealed class ConversationalAgentDetectorManager
  public sealed class DetectionConfigurationAvailabilityChangedEventArgs
  public enum DetectionConfigurationAvailabilityChangeKind
  public sealed class DetectionConfigurationAvailabilityInfo
  public enum DetectionConfigurationTrainingStatus
}
namespace Windows.ApplicationModel.DataTransfer {
  public sealed class DataPackage {
    event TypedEventHandler<DataPackage, object> ShareCanceled;
  }
}
namespace Windows.Devices.Bluetooth {
  public sealed class BluetoothAdapter {
    bool IsExtendedAdvertisingSupported { get; }
    uint MaxAdvertisementDataLength { get; }
  }
}
namespace Windows.Devices.Bluetooth.Advertisement {
  public sealed class BluetoothLEAdvertisementPublisher {
    bool IncludeTransmitPowerLevel { get; set; }
    bool IsAnonymous { get; set; }
    IReference<short> PreferredTransmitPowerLevelInDBm { get; set; }
    bool UseExtendedAdvertisement { get; set; }
  }
  public sealed class BluetoothLEAdvertisementPublisherStatusChangedEventArgs {
    IReference<short> SelectedTransmitPowerLevelInDBm { get; }
  }
  public sealed class BluetoothLEAdvertisementReceivedEventArgs {
    BluetoothAddressType BluetoothAddressType { get; }
    bool IsAnonymous { get; }
    bool IsConnectable { get; }
    bool IsDirected { get; }
    bool IsScannable { get; }
    bool IsScanResponse { get; }
    IReference<short> TransmitPowerLevelInDBm { get; }
  }
  public enum BluetoothLEAdvertisementType {
    Extended = 5,
  }
  public sealed class BluetoothLEAdvertisementWatcher {
    bool AllowExtendedAdvertisements { get; set; }
  }
  public enum BluetoothLEScanningMode {
    None = 2,
  }
}
namespace Windows.Devices.Bluetooth.Background {
  public sealed class BluetoothLEAdvertisementPublisherTriggerDetails {
    IReference<short> SelectedTransmitPowerLevelInDBm { get; }
  }
}
namespace Windows.Devices.Display {
  public sealed class DisplayMonitor {
    bool IsDolbyVisionSupportedInHdrMode { get; }
  }
}
namespace Windows.Devices.Input {
  public sealed class PenButtonListener
  public sealed class PenDockedEventArgs
  public sealed class PenDockListener
  public sealed class PenTailButtonClickedEventArgs
  public sealed class PenTailButtonDoubleClickedEventArgs
  public sealed class PenTailButtonLongPressedEventArgs
  public sealed class PenUndockedEventArgs
}
namespace Windows.Devices.Sensors {
 public sealed class Accelerometer {
    AccelerometerDataThreshold ReportThreshold { get; }
  }
  public sealed class AccelerometerDataThreshold
  public sealed class Barometer {
    BarometerDataThreshold ReportThreshold { get; }
  }
  public sealed class BarometerDataThreshold
  public sealed class Compass {
    CompassDataThreshold ReportThreshold { get; }
  }
  public sealed class CompassDataThreshold
  public sealed class Gyrometer {
    GyrometerDataThreshold ReportThreshold { get; }
  }
  public sealed class GyrometerDataThreshold
  public sealed class Inclinometer {
    InclinometerDataThreshold ReportThreshold { get; }
  }
  public sealed class InclinometerDataThreshold
  public sealed class LightSensor {
    LightSensorDataThreshold ReportThreshold { get; }
  }
  public sealed class LightSensorDataThreshold
  public sealed class Magnetometer {
    MagnetometerDataThreshold ReportThreshold { get; }
  }
  public sealed class MagnetometerDataThreshold
}
namespace Windows.Foundation.Metadata {
  public sealed class AttributeNameAttribute : Attribute
  public sealed class FastAbiAttribute : Attribute
  public sealed class NoExceptionAttribute : Attribute
}
namespace Windows.Globalization {
  public sealed class Language {
    string AbbreviatedName { get; }
    public static IVector<string> GetMuiCompatibleLanguageListFromLanguageTags(IIterable<string> languageTags);
  }
}
namespace Windows.Graphics.Capture {
  public sealed class GraphicsCaptureSession : IClosable {
    bool IsCursorCaptureEnabled { get; set; }
  }
}
namespace Windows.Graphics.DirectX {
  public enum DirectXPixelFormat {
    SamplerFeedbackMinMipOpaque = 189,
    SamplerFeedbackMipRegionUsedOpaque = 190,
  }
}
namespace Windows.Graphics.Holographic {
  public sealed class HolographicFrame {
    HolographicFrameId Id { get; }
  }
  public struct HolographicFrameId
  public sealed class HolographicFrameRenderingReport
  public sealed class HolographicFrameScanoutMonitor : IClosable
  public sealed class HolographicFrameScanoutReport
  public sealed class HolographicSpace {
    HolographicFrameScanoutMonitor CreateFrameScanoutMonitor(uint maxQueuedReports);
  }
}
namespace Windows.Management.Deployment {
  public sealed class AddPackageOptions
  public enum DeploymentOptions : uint {
    StageInPlace = (uint)4194304,
  }
  public sealed class PackageManager {
    IAsyncOperationWithProgress<DeploymentResult, DeploymentProgress> AddPackageByUriAsync(Uri packageUri, AddPackageOptions options);
    IVector<Package> FindProvisionedPackages();
    PackageStubPreference GetPackageStubPreference(string packageFamilyName);
    IAsyncOperationWithProgress<DeploymentResult, DeploymentProgress> RegisterPackageByUriAsync(Uri manifestUri, RegisterPackageOptions options);
    IAsyncOperationWithProgress<DeploymentResult, DeploymentProgress> RegisterPackagesByFullNameAsync(IIterable<string> packageFullNames, RegisterPackageOptions options);
    void SetPackageStubPreference(string packageFamilyName, PackageStubPreference useStub);
   IAsyncOperationWithProgress<DeploymentResult, DeploymentProgress> StagePackageByUriAsync(Uri packageUri, StagePackageOptions options);
  }
  public enum PackageStubPreference
  public enum PackageTypes : uint {
    All = (uint)4294967295,
  }
  public sealed class RegisterPackageOptions
  public enum RemovalOptions : uint {
    PreserveRoamableApplicationData = (uint)128,
  }
  public sealed class StagePackageOptions
  public enum StubPackageOption
}
namespace Windows.Media.Audio {
  public sealed class AudioPlaybackConnection : IClosable
  public sealed class AudioPlaybackConnectionOpenResult
  public enum AudioPlaybackConnectionOpenResultStatus
  public enum AudioPlaybackConnectionState
}
namespace Windows.Media.Capture {
  public sealed class MediaCapture : IClosable {
    MediaCaptureRelativePanelWatcher CreateRelativePanelWatcher(StreamingCaptureMode captureMode, DisplayRegion displayRegion);
  }
  public sealed class MediaCaptureInitializationSettings {
    Uri DeviceUri { get; set; }
    PasswordCredential DeviceUriPasswordCredential { get; set; }
  }
  public sealed class MediaCaptureRelativePanelWatcher : IClosable
}
namespace Windows.Media.Capture.Frames {
  public sealed class MediaFrameSourceInfo {
    Panel GetRelativePanel(DisplayRegion displayRegion);
  }
}
namespace Windows.Media.Devices {
  public sealed class PanelBasedOptimizationControl
}
namespace Windows.Media.MediaProperties {
  public static class MediaEncodingSubtypes {
    public static string Pgs { get; }
    public static string Srt { get; }
    public static string Ssa { get; }
    public static string VobSub { get; }
  }
  public sealed class TimedMetadataEncodingProperties : IMediaEncodingProperties {
    public static TimedMetadataEncodingProperties CreatePgs();
    public static TimedMetadataEncodingProperties CreateSrt();
    public static TimedMetadataEncodingProperties CreateSsa(byte[] formatUserData);
    public static TimedMetadataEncodingProperties CreateVobSub(byte[] formatUserData);
  }
}
namespace Windows.Networking.BackgroundTransfer {
  public sealed class DownloadOperation : IBackgroundTransferOperation, IBackgroundTransferOperationPriority {
    void RemoveRequestHeader(string headerName);
    void SetRequestHeader(string headerName, string headerValue);
  }
  public sealed class UploadOperation : IBackgroundTransferOperation, IBackgroundTransferOperationPriority {
    void RemoveRequestHeader(string headerName);
    void SetRequestHeader(string headerName, string headerValue);
  }
}
namespace Windows.Networking.Connectivity {
  public enum NetworkAuthenticationType {
    Owe = 12,
  }
}
namespace Windows.Networking.NetworkOperators {
  public sealed class NetworkOperatorTetheringAccessPointConfiguration {
    TetheringWiFiBand Band { get; set; }
    bool IsBandSupported(TetheringWiFiBand band);
    IAsyncOperation<bool> IsBandSupportedAsync(TetheringWiFiBand band);
  }
  public sealed class NetworkOperatorTetheringManager {
    public static void DisableNoConnectionsTimeout();
    public static IAsyncAction DisableNoConnectionsTimeoutAsync();
    public static void EnableNoConnectionsTimeout();
    public static IAsyncAction EnableNoConnectionsTimeoutAsync();
    public static bool IsNoConnectionsTimeoutEnabled();
  }
  public enum TetheringWiFiBand
}
namespace Windows.Networking.PushNotifications {
  public static class PushNotificationChannelManager {
    public static event EventHandler<PushNotificationChannelsRevokedEventArgs> ChannelsRevoked;
  }
  public sealed class PushNotificationChannelsRevokedEventArgs
  public sealed class RawNotification {
    IBuffer ContentBytes { get; }
  }
}
namespace Windows.Security.Authentication.Web.Core {
  public sealed class WebAccountMonitor {
    event TypedEventHandler<WebAccountMonitor, WebAccountEventArgs> AccountPictureUpdated;
  }
}
namespace Windows.Security.Isolation {
  public sealed class IsolatedWindowsEnvironment
  public enum IsolatedWindowsEnvironmentActivator
  public enum IsolatedWindowsEnvironmentAllowedClipboardFormats : uint
  public enum IsolatedWindowsEnvironmentAvailablePrinters : uint
  public enum IsolatedWindowsEnvironmentClipboardCopyPasteDirections : uint
  public struct IsolatedWindowsEnvironmentContract
 public struct IsolatedWindowsEnvironmentCreateProgress
  public sealed class IsolatedWindowsEnvironmentCreateResult
  public enum IsolatedWindowsEnvironmentCreateStatus
  public sealed class IsolatedWindowsEnvironmentFile
  public static class IsolatedWindowsEnvironmentHost
  public enum IsolatedWindowsEnvironmentHostError
  public sealed class IsolatedWindowsEnvironmentLaunchFileResult
  public enum IsolatedWindowsEnvironmentLaunchFileStatus
  public sealed class IsolatedWindowsEnvironmentOptions
  public static class IsolatedWindowsEnvironmentOwnerRegistration
  public sealed class IsolatedWindowsEnvironmentOwnerRegistrationData
  public sealed class IsolatedWindowsEnvironmentOwnerRegistrationResult
  public enum IsolatedWindowsEnvironmentOwnerRegistrationStatus
  public sealed class IsolatedWindowsEnvironmentProcess
  public enum IsolatedWindowsEnvironmentProcessState
  public enum IsolatedWindowsEnvironmentProgressState
  public sealed class IsolatedWindowsEnvironmentShareFolderRequestOptions
  public sealed class IsolatedWindowsEnvironmentShareFolderResult
  public enum IsolatedWindowsEnvironmentShareFolderStatus
  public sealed class IsolatedWindowsEnvironmentStartProcessResult
  public enum IsolatedWindowsEnvironmentStartProcessStatus
  public sealed class IsolatedWindowsEnvironmentTelemetryParameters
  public static class IsolatedWindowsHostMessenger
  public delegate void MessageReceivedCallback(Guid receiverId, IVectorView<object> message);
}
namespace Windows.Storage {
  public static class KnownFolders {
    public static IAsyncOperation<StorageFolder> GetFolderAsync(KnownFolderId folderId);
    public static IAsyncOperation<KnownFoldersAccessStatus> RequestAccessAsync(KnownFolderId folderId);
    public static IAsyncOperation<KnownFoldersAccessStatus> RequestAccessForUserAsync(User user, KnownFolderId folderId);
  }
  public enum KnownFoldersAccessStatus
  public sealed class StorageFile : IInputStreamReference, IRandomAccessStreamReference, IStorageFile, IStorageFile2, IStorageFilePropertiesWithAvailability, IStorageItem, IStorageItem2, IStorageItemProperties, IStorageItemProperties2, IStorageItemPropertiesWithProvider {
    public static IAsyncOperation<StorageFile> GetFileFromPathForUserAsync(User user, string path);
 }
  public sealed class StorageFolder : IStorageFolder, IStorageFolder2, IStorageFolderQueryOperations, IStorageItem, IStorageItem2, IStorageItemProperties, IStorageItemProperties2, IStorageItemPropertiesWithProvider {
    public static IAsyncOperation<StorageFolder> GetFolderFromPathForUserAsync(User user, string path);
  }
}
namespace Windows.Storage.Provider {
  public sealed class StorageProviderFileTypeInfo
  public sealed class StorageProviderSyncRootInfo {
    IVector<StorageProviderFileTypeInfo> FallbackFileTypeInfo { get; }
  }
  public static class StorageProviderSyncRootManager {
    public static bool IsSupported();
  }
}
namespace Windows.System {
  public sealed class UserChangedEventArgs {
    IVectorView<UserWatcherUpdateKind> ChangedPropertyKinds { get; }
  }
  public enum UserWatcherUpdateKind
}
namespace Windows.UI.Composition.Interactions {
  public sealed class InteractionTracker : CompositionObject {
    int TryUpdatePosition(Vector3 value, InteractionTrackerClampingOption option, InteractionTrackerPositionUpdateOption posUpdateOption);
  }
  public enum InteractionTrackerPositionUpdateOption
}
namespace Windows.UI.Input {
  public sealed class CrossSlidingEventArgs {
    uint ContactCount { get; }
  }
  public sealed class DraggingEventArgs {
    uint ContactCount { get; }
  }
  public sealed class GestureRecognizer {
    uint HoldMaxContactCount { get; set; }
    uint HoldMinContactCount { get; set; }
    float HoldRadius { get; set; }
    TimeSpan HoldStartDelay { get; set; }
    uint TapMaxContactCount { get; set; }
    uint TapMinContactCount { get; set; }
    uint TranslationMaxContactCount { get; set; }
    uint TranslationMinContactCount { get; set; }
  }
  public sealed class HoldingEventArgs {
    uint ContactCount { get; }
    uint CurrentContactCount { get; }
  }
  public sealed class ManipulationCompletedEventArgs {
    uint ContactCount { get; }
    uint CurrentContactCount { get; }
  }
  public sealed class ManipulationInertiaStartingEventArgs {
    uint ContactCount { get; }
  }
  public sealed class ManipulationStartedEventArgs {
    uint ContactCount { get; }
  }
  public sealed class ManipulationUpdatedEventArgs {
    uint ContactCount { get; }
    uint CurrentContactCount { get; }
  }
  public sealed class RightTappedEventArgs {
    uint ContactCount { get; }
  }
  public sealed class SystemButtonEventController : AttachableInputObject
  public sealed class SystemFunctionButtonEventArgs
  public sealed class SystemFunctionLockChangedEventArgs
  public sealed class SystemFunctionLockIndicatorChangedEventArgs
  public sealed class TappedEventArgs {
    uint ContactCount { get; }
  }
}
namespace Windows.UI.Input.Inking {
  public sealed class InkModelerAttributes {
    bool UseVelocityBasedPressure { get; set; }
  }
}
namespace Windows.UI.Text {
  public enum RichEditMathMode
  public sealed class RichEditTextDocument : ITextDocument {
    void GetMath(out string value);
    void SetMath(string value);
    void SetMathMode(RichEditMathMode mode);
  }
}
namespace Windows.UI.ViewManagement {
  public sealed class ApplicationView {
    bool CriticalInputMismatch { get; set; }
    bool TemporaryInputMismatch { get; set; }
    void ApplyApplicationUserModelID(string value);
  }
  public sealed class UISettings {
    event TypedEventHandler<UISettings, UISettingsAnimationsEnabledChangedEventArgs> AnimationsEnabledChanged;
    event TypedEventHandler<UISettings, UISettingsMessageDurationChangedEventArgs> MessageDurationChanged;
  }
  public sealed class UISettingsAnimationsEnabledChangedEventArgs
  public sealed class UISettingsMessageDurationChangedEventArgs
}
namespace Windows.UI.ViewManagement.Core {
  public sealed class CoreInputView {
    event TypedEventHandler<CoreInputView, CoreInputViewHidingEventArgs> PrimaryViewHiding;
    event TypedEventHandler<CoreInputView, CoreInputViewShowingEventArgs> PrimaryViewShowing;
  }
  public sealed class CoreInputViewHidingEventArgs
  public enum CoreInputViewKind {
    Symbols = 4,
  }
  public sealed class CoreInputViewShowingEventArgs
  public sealed class UISettingsController
}

The post Windows 10 SDK Preview Build 19008 available now! appeared first on Windows Developer Blog.

Azure Cost Management updates – October 2019

$
0
0

Whether you're a new student, thriving startup, or the largest enterprise, you have financial constraints and you need to know what you're spending, where, and how to plan for the future. Nobody wants a surprise when it comes to the bill, and this is where Azure Cost Management comes in!

We're always looking for ways to learn more about your challenges and how Cost Management can help you better understand where you're accruing costs in the cloud, identify and prevent bad spending patterns, and optimize costs to empower you to do more with less. Here are a few of the latest improvements and updates based on your feedback:

Let's dig into the details.


Cost Management at Microsoft Ignite 2019

Microsoft Ignite 2019 is right around the corner! Come join us in these Azure Cost Management sessions and don't forget to stop by the Azure Cost Management booth on the expo floor to say hi and get some cool swag.

And if you're still hungry for more, here are a few other sessions you might be interested in:


Cost Management update for partners

November will bring a lot of exciting announcements across Azure and Microsoft as a whole. Perhaps the one we’re most eager to see is the one we mentioned in our July update: the launch of Microsoft Customer Agreement support for partners, where Azure Cost Management will become available to Microsoft Cloud Solution Provider (CSP) partners and customers. CSP partners who have onboarded their customers to Microsoft Customer Agreement will be able to take advantage of all the native cost management tools Microsoft Enterprise Agreement and pay-as-you-go customers have today, but optimized for CSP.

Partners will be able to:

  • Understand and analyze costs directly in the portal and break them down by customer, subscription, meter, and more
  • Setup budgets to be notified or trigger automated actions when costs exceed predefined thresholds
  • Review invoiced costs and partner-earned credits associated with customers, subscriptions, and services
  • Enable Cost Management for customers using pay-as-you-go rates

And once Cost Management has been enabled for CSP customers, they’ll also be able to take advantage of these native tools when managing their subscriptions and resource groups.

All of this and more will be available to CSP partners and customers within the Azure portal and the underlying Resource Manager APIs to enable rich automation and integration to meet your specific needs. And this is just the first of a series of updates to enable Azure Cost Management for partners and their customers. We hope you find these tools valuable as an addition to all the new functionality Microsoft Customer Agreement offers and look forward to delivering even more cost management capabilities next year, including support for existing CSP customers. Stay tuned for the full Microsoft Customer Agreement announcement coming in November!


Major refresh for the Power BI connector

Azure Cost Management offers several ways to report on your cost and usage data. You can start with cost analysis in the portal, then download data for offline analysis. If you need more automation, you can use Cost Management APIs or schedule an export to push data to a storage account on a daily basis. But maybe you just need detailed reporting alongside other business reports. This is where the Azure Cost Management connector for Power BI comes in. This month you'll see a few major updates to the Power BI connector.

First and foremost, this is a new connector that replaces both the Azure Consumption Insights connector for Enterprise Agreement accounts and the Azure Cost Management (Beta) connector for Microsoft Customer Agreement accounts. The new connector supports both by accepting either an Enterprise Agreement billing account ID (enrollment number) or Microsoft Customer Agreement billing profile ID.

The next change Enterprise Agreement admins will notice is that you no longer need an API key. Instead, the new connector uses Azure Active Directory. The connector still requires access to the entire billing account, but now a read-only user can set it up without requiring a full admin to create an API key in the Enterprise Agreement portal.

Lastly, you'll also notice a few new tables for reservation details and recommendations. Reservation and Marketplace purchases have been added to the Usage details table as well as a new Usage details amortized table, which includes the same amortized data available in cost analysis. For more details, refer to the Reservation and Marketplace purchases update we announced in June 2019. Those same great changes are now available in Power BI.

Please check out the new connector and let us know what you'd like to see next!


BP implements cloud governance and effective cost management

BP has moved a significant portion of its IT resources to the Microsoft Azure cloud platform over the past five years as part of a company-wide digital transformation. To manage and deliver all its Azure resources in the most efficient possible way, BP uses Azure Policy for governance to control access to Azure services. At the same time, the company uses Azure Cost Management to track usage of Azure services. BP has been able to reduce its cloud spend by 40 percent with the insights it has gained.

BP customer video."We’ve used Azure Cost Management to help cut our cloud costs by 40 percent. Even though our total usage has close to doubled, our total spending is still well below what it used to be."
- John Maio, Microsoft Platform Chief Architect

Learn more about BP's customer story.


What's new in Cost Management Labs

With Cost Management Labs, you get a sneak peek at what's coming in Azure Cost Management and can engage directly with us to share feedback and help us better understand how you use the service, so we can deliver more tuned and optimized experiences. Here are a few features you can see in Cost Management Labs:

  • Get started quicker with the cost analysis Home view
    Cost Management offers five  built-in views to get started with understanding and drilling into your costs. The Home view gives you quicker access to those views so you get to what you need faster.
  • New: Scope selection and navigation optimized for active billing accountsNow available in the portal
    Cost Management now prioritizes active billing accounts when selecting a default scope and displaying available scopes in the scope picker.
  • New: Performance optimizations in cost analysis and dashboard tiles
    Whether you're using tiles pinned to the dashboard or the full experience, you'll find cost analysis loads faster than ever.

Of course, that's not all. Every change in Cost Management is available in Cost Management Labs a week before it's in the full Azure portal. We're eager to hear your thoughts and understand what you'd like to see next. What are you waiting for? Try Cost Management Labs today.


Scope selection and navigation optimized for active billing accounts

Cost Management is available at every scope above your resources – from a billing account or management group down to the individual resource groups where you manage your apps. You can manage costs in the context of the scope you're interested in or start in Cost Management and switch between scopes without navigating around the portal. Whatever works best for you. This month, we're introducing a few small tweaks to make it even easier to manage costs for your active billing accounts and subscriptions.

For those who start in Cost Management, you may notice the default scope has changed for you. Cost Management now prioritizes active billing accounts and subscriptions over renewed, cancelled, or disabled ones. This will help you get started even quicker without needing to change scope.

When you do change scope, the list of billing accounts may be a little shorter than you last remember. This is because those older billing accounts are now hidden by default, keeping you focused on your active billing accounts. To see your inactive billing accounts, uncheck the "Only show active billing accounts" checkbox at the bottom of the scope picker. This option also allows you to see all subscriptions, regardless of what's been pre-selected in the global subscription filter.

Lastly, when you're looking at all billing accounts and subscriptions, you'll see the inactive ones at the bottom of the list, with their status clearly called out for ultimate transparency and clarity.

Cost Management with an active billing account selected by default and the scope picker open, showing all active and inactive billing accounts with a prefix on each inactive billing account with its status

We hope these changes will make it easier for you manage costs across scopes. Let us know what you'd like to see next.


Improved right-sizing recommendations for virtual machines

One of the most critical learnings when moving to the cloud is how important it is to size virtual machines for the workload and use auto-scaling capabilities to grow (or shrink) to meet usage demands. In an effort to ensure your virtual machines are using the optimal size, Azure Advisor now factors CPU usage, memory, and network usage into right-sizing recommendations for more accurate recommendations you can trust. Learn more about the change in the latest Advisor update.


New ways to save money with Azure

There have been several new cost optimization improvements over the past month. Here are a few you might be interested in:


New videos

For those visual learners out there, here are a couple new videos you should check out:

Subscribe to the Azure Cost Management YouTube channel to stay in the loop with new videos as they're released and let us know what you'd like to see next.


Documentation updates

There were a lot of documentation updates. Here are a few you might be interested in:

Want to keep an eye on all of the documentation updates? Check out the Cost Management doc change history in the azure-docs repository on GitHub. If you see something missing, select Edit at the top of the document and submit a quick pull request.


What's next?

These are just a few of the big updates from last month. We're always listening and making constant improvements based on your feedback, so please keep the feedback coming.

Follow @AzureCostMgmt on Twitter and subscribe to the YouTube channel for updates, tips, and tricks. And, as always, share your ideas and vote up others in the Cost Management feedback forum.


Disaster recovery for SAP HANA Systems on Azure

$
0
0

This blog will cover the design, technology, and recommendations for setting up disaster recovery (DR) for an enterprise customer, to achieve best in class recovery point objective (RPO) and recovery time objective (RTO) with an SAP S/4HANA landscape. This post was co-authored by Sivakumar Varadananjayan, Global Head of Cognizant’s SAP Cloud Practice.

Microsoft Azure provides a trusted path to enterprise-ready innovation with SAP solutions in the cloud. Mission critical applications such as SAP run reliably on Azure, which is an enterprise proven platform offering hyperscale, agility, and cost savings for running a customer’s SAP landscape.

System availability and disaster recovery are crucial for customers who run mission-critical SAP applications on Azure.

RTO and RPO are two key metrics that organizations consider in order to develop an appropriate disaster recovery plan that can maintain business continuity due to an unexpected event.  Recovery point objective refers to the amount of data at risk in terms of “Time” whereas Recovery Time Objective refers to the amount of time or the maximum tolerable time that system can be down after disaster occurs.

The below diagram gives a view of RPO and RTO on a timeline view in a business as usual (BAU) scenario.

A timeline of RPO and RTO on a BAU secnario.

Orica is the world's largest provider of commercial explosives and innovative blasting systems to the mining, quarrying, oil and gas, and construction markets. They are also a leading supplier of sodium cyanide for gold extraction and a specialist provider of ground support services in mining and tunneling.

As part of Orica’s digital transformation journey, Cognizant has been chosen as a trusted technology advisor and managed cloud platform provider to build highly available, scalable, disaster proof IT platforms for SAP S/4HANA and other SAP applications in Microsoft Azure.

This blog describes how Cognizant took up the challenge of building a disaster recovery solution for Orica as a part of the Digital Transformation Program with SAP S/4HANA as a digital core. This blog contains the SAP on Azure architectural design considerations, by Cognizant and Orica, over the last two years, leading to a reduction in RTO to 4 hours. This is achieved by deploying the latest technology features available on Azure, coupled with automation. Along with reduction in RTO, there’s also reduction in RPO to less than 5 minutes with the use of database specific technologies such as SAP HANA system replication and Azure Site Recovery.

Design principles for disaster recovery systems

  • Selection of DR Region based on SAP Certified VMs for SAP HANA – It is important to verify the availability of SAP Certified VMs types in DR Region.
  • RPO and RTO Values – Businesses need to lay out clear expectations in RPO and RTO values which greatly affect the architecture for Disaster Recovery and requirements of tools and automation required to implement Disaster Recovery
  • Cost of Implementing DR, Maintenance and DR Drills
    • Criticality of systems – It is possible to establish Trade-off between Cost of DR implementation and Business Requirements. While most critical systems can utilize state of the art DR architecture, medium and less critical systems may afford higher RPO/RTO values.
    • On Demand Resizing of DR instances – It is preferable to use small size VMs for DR instances and upsize those during active DR scenario. It is also possible to reserve the required capacity of VMs at DR region so that there is no “waiting” time to upscale the VMs. Microsoft offers Reserved Instances with which one can reserve virtual machines in advance and save up to 80 percent. According to required RTO value a tradeoff needs to be worked out between running smaller VMs vs. Azure RI.
    • Additional considerations for cloud infrastructure costs, efforts in setting up environment for Non-disruptive DR Tests. Non-disruptive DR Tests refers to executing DR Tests without performing failover of actual productive systems to DR systems thereby avoiding any business downtimes. This involves additional costs for setting up temporary infrastructure which is in completely isolated vNet during the DR Tests.
    • Certain components in SAP systems architecture such as clustered network file system (NFS) which are not recommended to be replicated using Azure Site Recovery, hence there is a need for additional tools with license costs such as SUSE Geo-cluster or SIOS Data keeper for NFS Layer DR.
  • Selection of specific technology and tools – While Azure offers “Azure Site Recovery (ASR)” which replicates the virtual machines across the region, this technology is used at non-database components or layers of the system while database specific methods such as SAP HANA system replication (HSR) are used at database layer to ensure consistency of databases.

Disaster recovery architecture for SAP systems running on SAP HANA Database

At a very high level, the below diagram depicts the architecture of SAP systems based on SAP HANA and which systems will be available in case of local or regional failures.

An architecture diagram of SAP systems based on SAP HANA and which systems will be available in case of local or regional failures.

The diagram below gives next level details of SAP HANA systems components and corresponding technology used for achieving disaster recovery.

A more detailed diagram of SAP HANA systems components and corresponding technology used for achieving disaster recovery.

Database layer

At the database layer, database specific method of replications such as SAP HANA system replication (HSR) is used. Use of database specific replication method allows better control over RPO values by configuring various replication specific parameters and offers consistency of database at DR site. The alternative methods of achieving disaster recovery at the database (DB) layer such as backup and restore, and recovery or storage base replications are available however, they result in higher RTO values.

RPO Values for SAP HANA database depend on factors including replication methodology (Synchronous in case of high availability or Asynchronous in case of DR replication), backup frequency, backup data retention policies, savepoint, and replication configuration parameters.

SAP Solution Manager can be used to monitor the replication status, such that an e-mail alert is triggered if the replication is impacted.

A diagram showing disaster recovery architecture at the HANA database level, HANA system replication (HSR) is used for local availability as well as disaster recovery.

Even though multi-node replication is available as of SAP HANA 2.0 SP 3, revision 33, at the time or writing this article, this scenario is not tested in conjunction with high availability cluster. With successful implementation of multi-target replications, the DR maintenance process will become simpler and will not need manual interventions due to fail-over scenarios at primary site.

Application layer – (A)SCS, APP, iSCSI

Azure Site Recovery is used for replication of non-database components of SAP systems architecture including (A)SCS, application servers, and Linux cluster fencing agents such as iSCSI (with an exception of NFS layer which is discussed below.) Azure Site Recovery replicates workloads running on a virtual machines (VMs) from a primary site to a secondary location at storage layer and it does not require VM to be in a running state, and VMs can be started during actual disaster scenarios or DR drills.

There are two options to set up a pacemaker cluster in Azure. You can either use a fencing agent, which takes care of restarting a failed node via the Azure APIs or you can use a storage based death (SBD) device. The SBD device requires at least one additional virtual machine that acts as an iSCSI target server and provides an SBD device. These iSCSI target servers can however be shared with other pacemaker clusters. The advantage of using an SBD device is a faster failover time.

Below diagram describes disaster recovery at the application layer, (A)SCS, App servers, and iSCSI servers use the same architecture to replicate the data across DR region using Azure Site Recovery. 

A diagram showing disaster recovery at the application layer, (A)SCS, App servers, and iSCSI servers use the same architecture to replicate the data across DR region using Azure Site Recovery.

NFS layer – NFS layer at primary site uses a cluster with distributed replicated block device (DRBD) for high availability replication purposes. We evaluated multiple technologies for the implementation of DR at NFS layer. Since DRBD and Site Recovery configurations are not compatible, solutions such as SUSE geo cluster, SIOS data keeper, or simple VM snapshot backups and restore are available for achieving NFS layer DR. Since DRBD enables high availability at NFS layer using disk replication, Site Recovery replication is not supported. In case where DRBD is enabled, the cost-effective solution to achieve DR for NFS layer is by using simple backup/restore using VM snapshot backups.

Steps for invoking DR or a DR drill

Microsoft Azure Site Recovery technology helps in faster replication of data at the DR region. In a DR implementation where Site Recovery is not used or configured, it would take more than 24 hours to recover about five systems, and eventually RTO will result in 24 or more hours. However, when Site Recovery is used at the application layer with database specific method of replication at DB Layer being leveraged, it is possible to reduce the RTO value to well below four hours for same number of systems. Below diagram describes timeline view with the steps to activate disaster recovery with four hours RTO Value.

Steps for Invoking DR or a DR drill:

  • DNS Changes for VMs to use new IP addresses
  • Bring up iSCSI – single VM from ASR Replicated data
  • Recover Databases and Resize the VMs to required capacity
  • Manually provision NFS – Single VM using snapshot backups
  • Build Application layer VMs from ASR Replicated data
  • Perform cluster changes
  • Bring up applications
  • Validate Applications
  • Release systems

A screenshot of an example DR drill plan.

Recommendations on non-disruptive DR drills

Some businesses cannot afford down-time during DR drills. Non-disruptive DR drills are suggested in case where it is not possible to arrange downtimes to perform DR. A non-disruptive DR procedure can be achieved by creating an additional DR VNet, isolating it from the network, and carrying out DR Drill with below steps.

As a prerequisite, build SAP HANA database servers in the isolated VNet and configure SAP HANA system replication.

  1. Disconnect express route circuit to DR region, as express route gets disconnected it simulates abrupt unavailability of systems in primary region
  2. As a prerequisite, backup domain controller is required to be active and in replication mode with primary domain controller until the time of express route disconnection
  3. DNS server needs to be configured in isolated DR VNet (additional DR VNet Created for non-disruptive DR drill) and kept in standby mode until the time of express route disconnection
  4. Establish point to site VPN tunnel for administrators and key users for DR test
  5. Manually update the NSGs so that DR VNet is isolated from the entire network
  6. Bring up applications using DR enable procedure in DR region
  7. Once test is concluded, reconfigure NSGs, express route, and DR replications

Involvement of relevant infrastructure and SAP subject matter experts is highly recommended during DR tests.

Note that the non-disruptive DR procedure need to be executed with extreme caution with prior validation and testing with non-production systems. Database VMs capacity at DR region should be decided with a tradeoff between reserving full capacity vs. Microsoft’s timeline to allocate required capacity to resize the database VMs.

Next steps

To learn more about architecting a optimal Azure infrastructure for SAP see the following resources:

Identity, Registration and Activation of Non-packaged Win32 Apps

$
0
0

Many new and sought-after Windows APIs and features such as BackgroundTasks, Notifications, LiveTiles, Share and more, are either not available or not easily callable from non-packaged Win32 applications. This is due to the programming model for UWP APIs that integrate with the system and have a dependency on the following concepts:

  • Identity – The need for package or application identity to identify the caller, and an identifier to scope data and resources.
  • Registration – The need for configuration of machine state during application deployment, which is required by the API and indexed by the package or application identity.

For packaged applications, Identity declared in the Appxmanifest.xml, and Registration is handled by the MSIX deployment pipeline based on the information in the AppxManifest.xml. This allows a simplified calling pattern for UWP APIs where the application code just uses an API. Compare this to a typical Win32 API that requires a register-use-unregister pattern for managing a callback.

We’ve heard your feedback, and in response we’re filling in the divide between Win32 apps and new Windows APIs & features so that you can take advantage of these new APIs & features and enhance your applications. As of Windows Build 10.0.19000.0 we’re introducing the following new AppModel concepts to provide your Win32 app with deeper integration into the OS:

  • Sparse Package registration
    Signed MSIX packages can be installed on Windows today but all content referenced in the package’s Appxmanifest.xml must be present inside the package. A ‘Sparse’ Package contains an AppxManifest.xml but unlike a regular/full package, the manifest can reference files outside its package in a predetermined ‘external location’. This allows applications that are not yet able to adopt complete MSIX packaging to gain Identity, configure state (Registration) as required by UWP APIs and then take advantage of these APIs.
  • Package ‘External Location’
    To support a Sparse Package, a package definition now has a new <allowExternalContent> element. This is what allows your package AppxManifest.xml to reference content outside its package, in a specific location on disk. For example, if your existing Win32 app installs content in C:Program FilesMyWin32App , you can create a Sparse Package that declares the <allowExternalContent> element and during app installation or first run of your app, you can register the Sparse Package and declare C:Program FilesMyWin32App as the external location your app will be using. This way you can continue deploying all your other app artifacts in the locations you do today while taking advantage of the Sparse Package.
  • Win32 type RuntimeBehavior
    To help with compatibility of your existing Win32 app when using a Sparse Package, the app can register to have its application process be run like a non-packaged Win32 app as much as possible. This differs from a fully packaged Win32 app in that it is not subject to filesystem + registry virtualization, lifetime management by the system and other runtime attributes of fully packaged applications. The main runtime similarity between such an app and a fully packaged app is the presence of app/package identity in the running process.
  • Activation via CreateProcess
    The activation path for UWP applications today ensures the app has PackageIdentity in its process token. This is used by UWP APIs to identify the caller and refer to later – either to perform a callback or to look up state that was configured during deployment. Because of this requirement, calling CreateProcess() on a UWP exe will fail as the CreateProcess() pipeline was not enlightened about Identity. In order to support Sparse Packages with an External Location, we leverage the classic Win32 application.manifest to provide Identity in CreateProcess() scenarios.

At their core, these features are about providing a foundation for non-packaged Win32 processes to use our latest APIs and features.

*Please note that these are still new and somewhat advanced development features that do not yet have full Visual Studio integration i.e. there are still some gaps in the end to end authoring experience such as having to create a Sparse Package outside of Visual Studio.

Demo App

We’ll be using a sample application making use of a Sparse Package to walk through the different aspects of Sparse Package authoring and usage. The demo app is located at https://aka.ms/sparsepkgsample

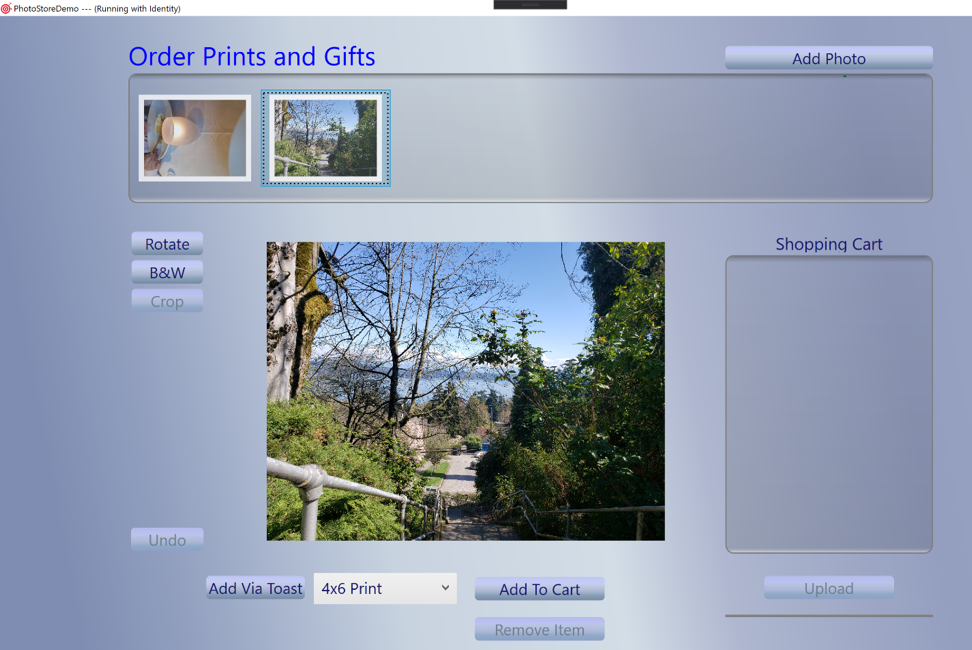
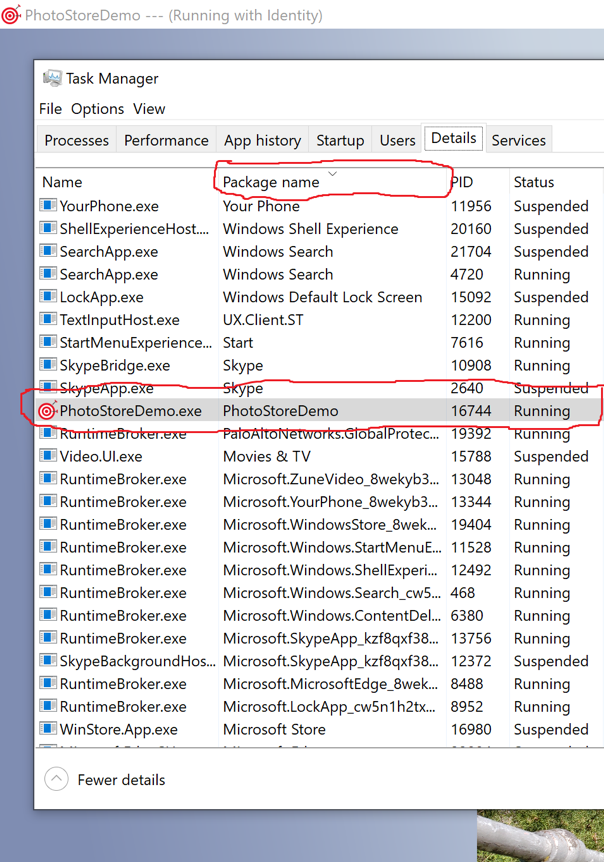
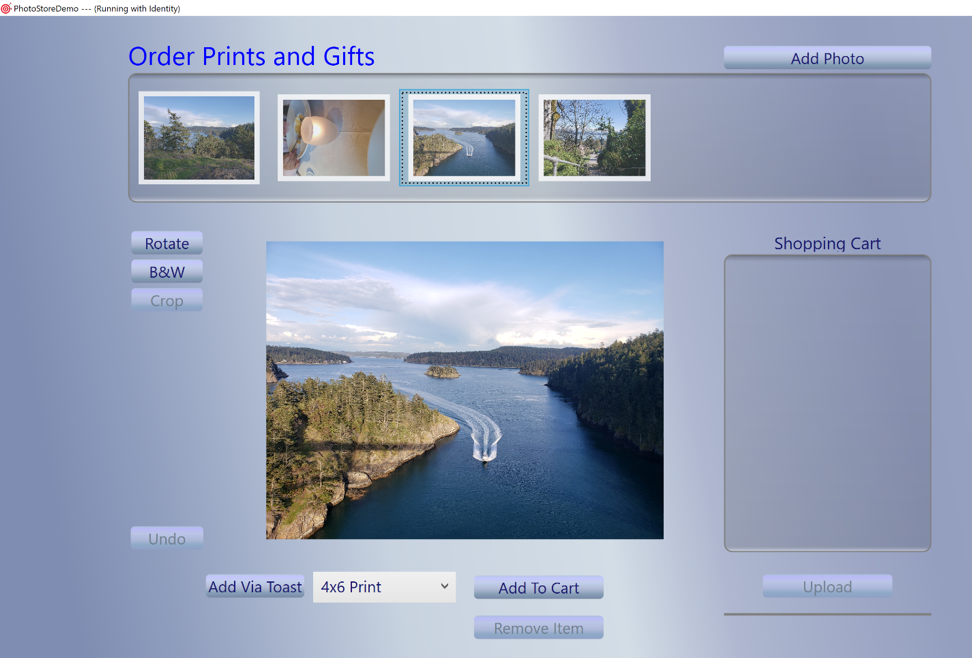
We have a non-packaged WPF application PhotoStoreDemo that stores and displays photos. In its purely non-packaged state, it can be challenging to take advantage of new Windows APIs and features. Our goal is to change this by creating a Sparse Package and continuing to use our previously existing Win32 app artifacts.

Anatomy of a Sparse Package

A Sparse Package must have an AppxManifest.xml and a minimal set of required visual assets in order to deploy.


<Package 
 xmlns:uap10="http://schemas.microsoft.com/appx/manifest/uap/windows10/10" 
 IgnorableNamespaces="uap10">
  <Identity Name="PhotoStoreDemo" Publisher="CN=Contoso" ... />
  <Properties>
   ...
    <Logo>Assetsstorelogo.png</Logo>
    <uap10:AllowExternalContent>true</uap10:AllowExternalContent>
  </Properties>
  <Dependencies>
    <TargetDeviceFamily Name="Windows.Desktop" 
     MinVersion="10.0.19000.0" 
     MaxVersionTested="10.0.19000.0" />
  </Dependencies>
  <Capabilities>
    <rescap:Capability Name="runFullTrust" />
    <rescap:Capability Name="unvirtualizedResources"/>
  </Capabilities>
...
  <Applications>
    <Application Id="PhotoStoreDemo" 
    Executable="PhotoStoreDemo.exe" 
    uap10:TrustLevel="mediumIL" 
    uap10:RuntimeBehavior="win32App"> 
     ...
    </Application>
  </Applications>
</Package>
	

Let’s use the AppxManifest.xml from our sample code above to look at the anatomy of a Sparse Package.

Package External Location

Firstly, the AppxManifest should declare the <AllowExternalContent> package property. This allows the manifest to reference content that is not located within the package. Any content referenced in the Sparse Package that isn’t located in the package directly should be in the ‘external’ location which is specified when the Sparse Package is registered. For example, if I declare my package’s external location to be C:Program FilesMyDesktopApp during installation or at first run, the image storelogo.png defined for the <Logo> property should be installed at C:Program FilesMyDesktopAppAssetsstorelogo.png and the main application executable PhotoStoreDemo.exe should be installed at C:Program FilesMyDesktopAppPhotoStoreDemo.exe. In addition, the MinVersion should be OS Build 10.0.19000.0 or greater, Sparse packages are currently not supported on OS versions earlier than this.

It’s important to note that unlike a fully packaged application, an app using a Sparse Package + ‘External Location’ is not fully managed by the OS at deployment, runtime and uninstall. As is the case with Win32 apps today, your application is responsible for install and uninstall of all its artifacts including the Sparse Package and any content in the ‘external location’. This also means your app doesn’t receive lifetime management and tamper protection that fully packaged apps receive from being installed in a locked down location on the System.

Win32 Runtime Behavior

The newly introduced TrustLevel=mediumIL and RuntimeBehavior=Win32App attributes in the <Application> element are used to declare that the application associated with this Sparse Package will run like a Win32 app, with no registry + filesystem virtualisation and other runtime changes.

Sparse Package Authoring

The steps required in authoring Sparse Package are:

  1. Create an AppxManifest.xml + Visual Assets and package them
  2. Sign the Sparse Package
  3. Create a classic Win32 application.manifest in your Win32 app
  4. Register the Sparse Package

Creating and Packaging an AppxManifest.xml + Visual Assets

The first step in creating a Sparse Package is generating the AppxManifest.xml. The AppxManifest needs to contain the properties listed above, you can use this template as a starting point. In addition to the AppxManifest you need to include the visual assets referenced in the manifest file. You can use the “Visual Assets” node in the package.manifest editor of the Visual Studio Application Packaging Project to generate the visual assets.

Once you have your AppxManifest.xml and visual assets, you can use App Packager (MakeAppx.exe) to create a Sparse Package. Because the Sparse package doesn’t contain all the files referenced in the AppxManifest.xml, you need to specify the /nv command.

Here is an example command to create a Sparse Package containing just an AppxManifest.xml from a VS Developer Command Prompt:

MakeAppx.exe  pack  /d  <Path to directory with AppxManifest.xml>  /p  <Output Path>mypackage.msix  /nv

You can find more info on App packager (MakeAppx.exe) here.

Signing a Sparse package

To successfully install on a machine, your Sparse Package must be signed with a cert that is trusted on that machine. This is the case for regular MSIX packages today. You can create a new self-signed cert for development purposes and sign your Sparse Package using the SignTool available in the Windows SDK and MSIX Toolkit. You can also make use of the newly announced Device Guard Signing feature.
Here’s an example of how to sign a Sparse Package from a VS Developer Command Prompt using the Sign Tool:

SignTool.exe sign /fd SHA256 /a /f <path to cert>mycert.pfx  /p <cert password>  <Path to Package>mypackage.msix

Creating a classic Win32 application.manifest

To support CreateProcess() scenarios that do not go through the UWP activation pipeline, your app must use the classic Win32-style application.manifest to declare the identity attributes of your application under the new <msix> element. The values defined in the manifest are used determine your application’s identity when its executable is launched and must match those declared in your Sparse Package’s AppxManifest.xml.


<?xml version="1.0" encoding="utf-8"?>
<assembly manifestVersion="1.0" xmlns="urn:schemas-microsoft-com:asm.v1">
  <assemblyIdentity version="0.0.0.1" name="PhotoStoreDemo.app"/>
  <msix xmlns="urn:schemas-microsoft-com:msix.v1"
          publisher="CN=Contoso"
          packageName="PhotoStoreDemo"
          applicationId="PhotoStoreDemo"
        />
</assembly>

packageName (above) corresponds to Name and publisher corresponds to Publisher in the <Identity> element of your Sparse package:

(Sparse Package)


<Identity Name="PhotoStoreDemo" Publisher="CN=Contoso" ... />

applicationId corresponds to the Id attribute in the <Application> element for this app declared in the Sparse package:

(Sparse Package)


Applications>
    <Application Id="PhotoStoreDemo"...>
    ...

To add a classic Win32 manifest to an existing project in Visual studio, from the application node right click | Add | New Item | Visual C# | Application Manifest File. The manifest file naming convention is that it must have the same name as your application’s .exe and have the .manifest extension, in this case I named it “PhotoStoreDemo.exe.manifest”.

Taking advantage of your app’s Sparse Package

As earlier mentioned, creating a Sparse Package for your application makes it easier for your Win32 app to deeply integrate with the OS and take advantage of features such as BackgroundTasks, Share, Notifications and Tiles. Let’s have a look at how our sample app runs and uses the Sparse Package to register as a Share Target and make use of UWP activation.

The workflow in our sample looks something like this:

  1. Declare our app as a Share Target in the Sparse Package AppxManifest.xml
  2. Register our app’s Sparse Package with the OS.
  3. Relaunch the app and handle activation types.

Example usage – Declaring your app as a Share Target in the Sparse Package AppxManifest.xml

Our sample app is registered as a Share Target by declaring the windows.ShareTarget Application Extension in the Sparse Package AppxManifest.xml:


<Extensions>
        <uap:Extension Category="windows.shareTarget">
          <uap:ShareTarget Description="Send to PhotoStoreDemo">
            <uap:SupportedFileTypes>
              <uap:FileType>.jpg</uap:FileType>
              <uap:FileType>.png</uap:FileType>
              <uap:FileType>.gif</uap:FileType>
            </uap:SupportedFileTypes>
            <uap:DataFormat>StorageItems</uap:DataFormat>
            <uap:DataFormat>Bitmap</uap:DataFormat>
          </uap:ShareTarget>
        </uap:Extension>
      </Extensions>

Registering a Sparse Package

To take advantage of a Sparse package, your application needs to register the signed package with the system. You can register the package during first run, or you can also register the package during installation of your other Win32 artifacts, if you’re using an installer such as an MSI. To install the package using an MSI you’d need to use Custom Actions. In our sample app, we register the Sparse package during first run. When our application is launched, we check if it’s running with Identity (identity or the lack thereof is a signal of whether the Sparse package has been registered/installed) if the app is not running with identity we then register the Sparse Package and restart the app. This is expected to take place only once at first run. To see how we’re determining if the app is running with identity, have a look at the ExecutionMode class and this post if you’d like more background.

This is what the code in our app looks like:


//if app isn't running with identity, register its sparse package
            if (!ExecutionMode.IsRunningWithIdentity())
            {
                string externalLocation = @"C:<App_Install_location_root>";
                string sparsePkgPath = @"C:<App_Install_location_root>PhotoStoreDemo.msix";

                //Attempt registration
                if (registerSparsePackage(externalLocation, sparsePkgPath))
                {
                    //Registration succeded, restart the app to run with identity
                    System.Diagnostics.Process.Start(Application.ResourceAssembly.Location, arguments: cmdArgs?.ToString());
                }
                else //Registration failed, run without identity
                {
                    Debug.WriteLine("Package Registation failed, running WITHOUT Identity");
                    SingleInstanceManager wrapper = new SingleInstanceManager();
                    wrapper.Run(cmdArgs);
                }

            }


And this is the registerSparsePackage method called above handling package registration:


Using Windows.Management.Deployment
...
private static bool registerSparsePackage(string externalLocation, string sparsePkgPath)
        {
            bool registration = false;
            try
            {                   
                Uri externalUri = new Uri(externalLocation);
                Uri packageUri = new Uri(sparsePkgPath);
                PackageManager packageManager = new PackageManager();
                //Set the externalLocation where your Win32 artifacts will be installed
		 //Anything not in the package but referenced by your AppxManifest.xml needs to   to be under this location
                var options = new AddPackageOptions();
                options.ExternalLocationUri = externalUri;

                Windows.Foundation.IAsyncOperationWithProgress<DeploymentResult, DeploymentProgress> deploymentOperation = packageManager.AddPackageByUriAsync(packageUri, options)

                 ...

To register the Sparse packages, you need to make use of the PackageManager AddPackageByUriAsync(packageUri, addPackageOptions) API. The API takes in the location of your signed Sparse Package as a URI and an AddPackageOptions object. You need to create an AddpackageOptions object and set the ExternalLocationUri property to the URI of the location where your Win32 artifacts (e.g. app executable) being referenced in the Sparse Package will be installed.

Handling App Activation

When our app is running, we check whether it was launched under UWP type activation e.g. a Share Event or Notification Event. If it was, we handle the activation event accordingly, otherwise, we handle the launch as a regular .exe launch such as double clicking the app .exe. Here’s a look at the code:


public static void Main(string[] cmdArgs) 
        {
            ...
    //Handle Sparse Package based activation e.g Share target activation or clicking on a Tile
    // Launching the .exe directly will have activationArgs == null
              var activationArgs = AppInstance.GetActivatedEventArgs();
                if (activationArgs != null)
                {
                    switch (activationArgs.Kind)
                    {
                        case ActivationKind.Launch:
                            HandleLaunch(activationArgs as LaunchActivatedEventArgs);
                            break;
                        case ActivationKind.ToastNotification:
                            HandleToastNotification(activationArgs as ToastNotificationActivatedEventArgs);
                            break;
                        case ActivationKind.ShareTarget:
                            HandleShareAsync(activationArgs as ShareTargetActivatedEventArgs);
                            break;
                        default:
                            HandleLaunch(null);
                            break;
                    }

                }
  //This is a direct exe based launch e.g. double click.exe or desktop shortcut
                else
                {
                    SingleInstanceManager singleInstanceManager = new SingleInstanceManager();
                    singleInstanceManager.Run(cmdArgs);
                }
            }
        }

Running the Sample

To run the sample app at https://aka.ms/sparsepkgsample:

  1. Make sure your machine has Developer Mode turned on, and both your Windows Build and SDK versions are 10.0.0 or later.
  2. Retarget the solution to the SDK version on your machine – Right click -> Retarget solution.
  3. Add a project reference to the Windows.winmd file at “C:Program Files (x86)Windows Kits10UnionMetadata<SDK_Version>Windows.winmd”
    (Right click PhotoStoreDemo project | Add | Reference| Browse | All files | Windows.winmd)
  4. Make sure the Sparse Package is signed by a trusted cert on your machine.
    • You can sign using an existing cert or you can create a self-signed cert and trust it on your machine by double clicking | Install certificate | Local Machine | Place all certificates in the following store | Browse | Trusted People | Next | Finish
    • Update, package and sign the unpackaged files in PhotoStoreDemoPkg. Open the AppxManifest.xml and update the Publisher value in the package <Identity> element to match the publisher value in your cert. *You will also need to make sure the Publisher value is updated in the classic Win32 app.manifest (PhotoStoreDemo.exe.manifest) to match the new value in the AppxManifest.xml.
    • Follow the steps under “Creating and Packaging an AppxManifest.xml” and “Signing a Sparse Package” sections to package the files with App Packager (MakeAppx) and then sign them with the SignTool or Device Guard Signing.
  5. Once the Sparse Package is signed, in the main method (in Startup.cs) update the externalLocation value to match the output location of your VS Build binaries and the sparsePkgPath value to match the path to your signed Sparse Package.
  6. When you run the package, you should see the PhotoStoreDemo app launch with a “Running with Identity” tag in the top left corner. If registration of the package failed the tag will read “Desktop App” instead. If the package registration was successful and the app still launches without identity, try double checking to make sure the values in the <msix> element of the classic Win32 app.manifest (PhotoStoreDemo.exe.manifest) match the values in the <Identity> and <Application> element of your Sparse Package’s AppxManifest.xml.

Launching the app with identity:

Screen showing launching the app with identity.

Checking the Details tab in Task Manager shows the app running with a Package Name PhotoStoreDemo which is an indicator that the app is running with our Sparse Package’s declared identity:

PhotoStoreDemo Screen

After my app has successfully registered the Sparse package, it shows up as a Share target when I right click on a .jpg/.png/.gif file:

Screen showing share button.

PhotoStore Demo screen.

Selecting our app activates the app and adds the new image to the image store.

PhotoStore Demo app screen.

As a bonus, our sample handles toast notification activation in the HandleToastNotification() method in Startup.cs. Clicking the “Add Via Toast” button in the bottom left quadrant of the running app launches a toast message from the app.

Type a reply screen.

If you enter a full path to an image file, it should add the image file to the app’s photo store. If you close the app before responding to the toast, it will relaunch the app with the new image you specified in the path.

Relaunch screen of the app.

Uninstalling your Sparse Package

Unlike a fully packaged application that is uninstalled by the System when a user chooses to uninstall the app, a Sparse Package must be uninstalled by the application that registers it. The uninstall workflow of a Sparse Package points the user to the uninstaller of the application that registered the package and while uninstalling the Win32 artifacts of the app, the uninstaller must also remove the Sparse Package. This can be done using the PackageManager.RemovePackage..() APIs, you can find an example of an app using the APIs here.

Adding a Sparse Package to your existing Win32 app is a great way to give your application identity and add deeper integration with Windows APIs and features such as Notifications, BackgroundTasks, Live Tiles, Share and more. The main caveats are that unlike for fully packaged applications, your application does not receive tamper protection and installation in a locked down location. In addition, your app is not fully managed by the OS at deployment, runtime and uninstall – your application is responsible for install, lifetime management and uninstall of your Sparse Package, in the same way you are responsible for installing and managing your Win32 app artifacts.

The post Identity, Registration and Activation of Non-packaged Win32 Apps appeared first on Windows Developer Blog.

Azure IoT Tools October Update: new experience of sending device-to-cloud messages and more!

$
0
0

Welcome to the October update of Azure IoT Tools!

In this October release, you will see the totally new experience of sending device-to-cloud messages and Azure IoT Device Provisioning Service support in Visual Studio Code.

New experience of sending device-to-cloud messages

Z, a software engineer, developed an application about a smart home assistant using Azure IoT service, and he wonders if the application works fine. He wants to send messages indicating time and temperature to IoT Hub from many devices simultaneously each for many iterations. In this case, these messages should be formed in a similar template but the data should be randomly generated for each message. In addition, he wants to send these messages repeatedly, each with a fixed interval, like one second, as is done by true temperature sensors.

This is a very common scenario in IoT development, frustrating a lot of programmers. Here is the good news for Z, and for all of you: You can get rid of all these trivial things with the help of our new feature!

We improved the function in Azure IoT Hub Toolkit (part of the Azure IoT Tools extension pack now) to help you quickly send D2C messages. You only need to specify the device(s), the number of iteration(s), the delivery interval, and the data template. And then we will randomly generate data in your specified format for you and send it out.

For more details, you can check out this blog post to see how to use this feature with the step-by-step instructions.

Support Azure IoT Hub Device Provisioning Service in Visual Studio Code

The Azure IoT Hub Device Provisioning Service is a helper service for Azure IoT Hub that enables zero-touch, just-in-time provisioning to the correct Azure IoT hub without requiring human intervention, enabling customers to provision millions of devices in a secure and scalable manner.

We’re pleased to announce that Azure IoT Tools extension for Visual Studio Code now supports the Azure IoT Hub Device Provisioning Service. You can now view your Azure IoT Hub Device Provisioning Services without leaving Visual Studio Code.

Try it out

Please don’t hesitate to give it a try! If you have any feedback, feel free to reach us at https://github.com/microsoft/vscode-azure-iot-tools/issues. We will continuously improve our IoT developer experience to empower every IoT developers on the planet to achieve more!

The post Azure IoT Tools October Update: new experience of sending device-to-cloud messages and more! appeared first on Visual Studio Blog.

Join the Microsoft Edge team next week at Ignite 2019

$
0
0

Next week, we will be travelling to Microsoft Ignite 2019 to share what’s new in Microsoft Edge for enterprises, IT professionals, and web developers. We’re very excited to share more about our journey with Chromium over the past year, what it means to your customers, and to hear your feedback.

In this post, we’ve outlined all the breakout sessions and other activities our team will be presenting at Ignite next week, so you can easily track which sessions you want to attend or review later. This year, Ignite is also introducing Roundtable Topics, which are a great opportunity to share your experiences with the product team directly, provide feedback, and help us understand how we can empower you and your organization with Microsoft Edge.

The full list of sessions is provided below. We look forward to seeing you there! Don’t miss out—sign in using your attendee or tech community account to build your Ignite schedule today!

Microsoft Edge at Ignite 2019

Monday, November 4th

2:00 – 2:45 PM: BRK012 – The Web: Where the rubber hits the road on security and manageability, productivity, and conversion

Join VP of Product for Microsoft Edge, Chuck Friedman, Group Product leader for Microsoft Edge Enterprise, Sean Lyndersay, and VP of Bing, Jordi Ribas to discuss how Microsoft Edge and Microsoft Search in Bing is the best browser and search for business. We can help you with a systematic approach to identity and security, high-performing intranet and internet searches, and how to think about web and app compatibility on the internet.

3:15 – 4:00 PM: BRK1019 – State of the Browser: Microsoft Edge

Come learn about the history of Microsoft Edge and the decision to move to Chromium as well as the roadmap for enterprises and show you the 4 pillars of what the team focuses on: Rock solid fundamentals, Safety and Security, Flexible and efficient manageability and deployment, and end-user productivity.

Tuesday, November 5th

1:50 – 2:10 PM: THR2279 – Mechanics Live: Microsoft Edge and Microsoft Search: Complete tour for IT admins and users

Join Chuck Friedman and Jeremy Chapman to get a comprehensive understanding of the enterprise-focused capabilities in the new Microsoft Edge browser. This is a 20-minute Theater session filmed in the Mechanics Live studio in the hub and you are a part of the experience.

3:05 – 3:25 PM: THR108 – Top 10 reasons while you’ll choose the next version of Microsoft Edge

We’re on a mission to create the best browser for the enterprise. We believe the next version of Microsoft Edge is that browser and in this session, we will share the top 10 reasons why.

Roundtable Topics

Wednesday, November 6th

 10:15 – 11:00 AM: BRK2230 – 1 browser for modern and legacy web apps: deploying Microsoft Edge and IE mode

We have worked with numerous companies – ranging from 1,000’s to 100,000’s of seats – to move from multiple browser environments to a single browser environment. We’ll share lessons learned and best practices for piloting and deploying the next version of Microsoft Edge by leveraging our investments in Internet Explorer mode, Configuration Manager, and Intune.

1:50 – 2:10 PM: THR1075 – Enterprise ready PDF solution in Microsoft Edge

Customers have communicated they want a PDF solution in the browser, so they don’t have to manage additional 3rd party software. The Microsoft Edge’s PDF solution will help you understand the investments we’re making so we can accomplish that specific feedback.

Roundtable Topics

Thursday, November 7th

12:45 – 1:30 PM: BRK3099 – Moving the web forward: Microsoft Edge for web developers

The next version of Microsoft Edge is built on a new foundation, powered by Chromium. This foundation will empower you with a consistent set of developer tools and enable you to deliver powerful standards-based and hybrid application experiences using web technologies. In this session, we’ll share how our upcoming release simplifies cross-browser testing and enables the latest capabilities for your sites and line of business (LOB) apps, plus our ongoing contributions to Chromium that improve the browser experience for everyone. Finally, we’ll reveal what’s next for web developers in the new Microsoft Edge.

3:40 – 4:00 PM: THR106 – Microsoft Edge on macOS

Microsoft Edge will be our first browser for macOS in 13 years. In this session, we share how Microsoft Edge feels at home on macOS, how you can be more productive and secure using it, and what you need to know about managing Microsoft Edge on macOS.

Roundtable Topics

Friday, November 8th

10:15 – 11:00 AM: BRK3253 – Protected, Productive mobile browsing with Microsoft Edge and Intune

Microsoft Edge isn’t just a desktop browser. The mobile platform has been going strong for close to 2 years. This session will show you the investments we’re making to allow for a full range of experiences starting with management capabilities with Intune, customizing the end user experience, and how to migrate from the Microsoft Intune managed browser to Microsoft Edge.

11:30 AM – 12:15 PM: BRK2231 – Keep users productive and data secure in a cloud-first world: secure browsing with Microsoft Edge

Wrap up your Friday with a deep dive on all things security regarding Microsoft Edge. Features such as Application Guard, Conditional Access, and Microsoft Information Protection will be discussed along with other security measures to show you how Microsoft Edge is the most secure browser in the enterprise.

See you there! Don’t forget to sign in using your attendee or tech community account to build your Ignite schedule today!

Colleen Williams, Senior Program Manager, Microsoft Edge

The post Join the Microsoft Edge team next week at Ignite 2019 appeared first on Microsoft Edge Blog.

Microsoft C++ Team At CppCon 2019: Videos Available

$
0
0

Last month a large contingent from the Microsoft C++ team attended CppCon. We gave fourteen presentations covering our tools, developments in the standard, concepts which underlie the work we do, and more.

We also recorded an episode of CppCast with Microsoft MVPs Rob Irving and Jason Turner. You can hear more about the Open Sourcing of MSVC’s STL, the upcoming ASAN support in Visual Studio and our team’s effort in achieving C++17 standards conformance.

All our CppCon videos are available now, so please give them a watch and let us know what you think!

If you have any subjects you’d like us to consider talking about at CppCon 2020 or other conferences, please let us know. We can be reached via the comments below, email (visualcpp@microsoft.com), and Twitter (@VisualC).

The post Microsoft C++ Team At CppCon 2019: Videos Available appeared first on C++ Team Blog.

Introducing Orleans 3.0

$
0
0

This is a guest post from the Orleans team. Orleans is a cross-platform framework for building distributed applications with .NET. For more information, see https://github.com/dotnet/orleans.

We are excited to announce the Orleans 3.0 release. A great number of improvements and fixes went in, as well as several new features, since Orleans 2.0. These changes were driven by the experience of many people running Orleans-based applications in production in a wide range of scenarios and environments, and by the ingenuity and passion of the global Orleans community that always strives to make the codebase better, faster, and more flexible. A BIG Thank You to all who contributed to this release in various ways!

Major changes since Orleans 2.0

Orleans 2.0 was released a little over 18 months ago and since then Orleans has made significant strides. Some of the headline changes since 2.0 are:

  • Distributed ACID transactions — multiple grains can join a transaction regardless of where their state is stored
  • A new scheduler, which alone increased performance by over 30% in some cases
  • A new code generator based on Roslyn code analysis
  • Rewritten cluster membership for improved recovery speed
  • Co-hosting support

As well as many, many other improvements and fixes.

Since the days of working on Orleans 2.0, the team established a virtuous cycle of implementing or integrating certain features, such as generic host, named options, in close collaboration with the .NET team before those features are ready to be part of the .NET Core releases, contributing feedback and improvements “upstream”, and in later releases switching to their final implementations shipped with .NET releases. During development of Orleans 3.0, this cycle continued, with Bedrock code used by Orleans 3.0.0-beta1 before it finally shipped as part of .NET 3.0. Similarly, support for TLS on TCP socket connections was implemented as part of Orleans 3.0, and is intended to become part of a future release of .NET Core. We view this ongoing collaboration as our contribution to the larger .NET ecosystem, in the true spirit of Open Source.

Networking layer replacement with ASP.NET Bedrock

Support for securing communication with TLS has been a major ask for some time, both from the community as well as from internal partners. With the 3.0 release we are introducing TLS support, available via the Microsoft.Orleans.Connections.Security package. For more information, see the TransportLayerSecurity sample.

Implementing TLS support was a major undertaking due to how the networking layer in previous versions of Orleans was implemented: it could not be easily adapted to use SslStream, which is the most common method for implementing TLS. With TLS as our driving force, we embarked upon a journey to rewrite Orleans’ networking layer.

Orleans 3.0 replaces its entire networking layer with one built on top of Project Bedrock, an initiative from the ASP.NET team. The goal of Bedrock is to help developers to build fast and robust network clients and servers.

The ASP.NET team and the Orleans team worked together to design abstractions which support both network clients and servers, are transport-agnostic, and can be customized using middleware. These abstractions allow us to change the network transport via configuration, without modifying internal, Orleans-specific networking code. Orleans’ TLS support is implemented as a Bedrock middleware and our intention is for this to be made generic so that it can be shared with others in the .NET ecosystem.

Although the impetus for this undertaking was to enable TLS support, we see an approximately 30% improvement in throughput on average in our nightly load tests.

The networking layer rewrite also involved replacing our custom buffer pooling with reliance on MemoryPool<byte> and in making this change, serialization now takes more advantage of Span<T>. Some code paths which previously relied on blocking via dedicated threads calling BlockingCollection<T> are now using Channel<T> to pass messages asynchronously. This results in fewer dedicated threads, moving the work to the .NET thread pool instead.

The core wire protocol for Orleans has remained fixed since its initial release. With Orleans 3.0, we have added support for progressively upgrading the network protocol via protocol negotiation. The protocol negotiation support added in Orleans 3.0 enables future enhancements, such as customizing the core serializer, while maintaining backwards compatibility. One benefit of the new networking protocol is support for full-duplex silo-to-silo connections rather than the simplex connection pairs established between silos previously. The protocol version can be configured via ConnectionOptions.ProtocolVersion.

Co-hosting via the Generic Host

Co-hosting Orleans with other frameworks, such as ASP.NET Core, in the same process is now easier than before thanks to the .NET Generic Host.

Here is an example of adding Orleans alongside ASP.NET Core to a host using UseOrleans:

var host = new HostBuilder()
  .ConfigureWebHostDefaults(webBuilder =>
  {
    // Configure ASP.NET Core
    webBuilder.UseStartup<Startup>();
  })
  .UseOrleans(siloBuilder =>
  {
    // Configure Orleans
    siloBuilder.UseLocalHostClustering();
  })
  .ConfigureLogging(logging =>
  {
    /* Configure cross-cutting concerns such as logging */
  })
  .ConfigureServices(services =>
  {
    /* Configure shared services */
  })
  .UseConsoleLifetime()
  .Build();

// Start the host and wait for it to stop.
await host.RunAsync();

Using the generic host builder, Orleans will share a service provider with other hosted services. This grants these services access to Orleans. For example, a developer can inject IClusterClient or IGrainFactory into an ASP.NET Core MVC controller and call grains directly from their MVC application.

This functionality can be used to simplify your deployment topology or to add additional functionality to an existing application. Some teams internally use co-hosting to add Kubernetes liveness and readiness probes to their Orleans silos using the ASP.NET Core Health Checks.

Reliability improvements

Clusters now recover more quickly from failures thanks to extended gossiping. In previous versions of Orleans, silos would send membership gossip messages to other silos, instructing them to update membership information. Gossip messages now include versioned, immutable snapshots of cluster membership. This improves convergence time after a silo joins or leaves the cluster (for example during upgrade, scaling, or after a failure) and alleviates contention on the shared membership store, allowing for quicker cluster transitions. Failure detection has also been improved, with more diagnostic messages and refinements to ensure faster, more accurate detection. Failure detection involves silos in a cluster collaboratively monitoring each other, with each silo sending periodic health probes to a subset of other silos. Silos and clients also now proactively disconnect from silos which have been declared defunct and they will deny connections to such silos.

Messaging errors are now handled more consistently, resulting in prompt errors being propagated back to the caller. This helps developers to discover errors more quickly. For example, when a message cannot be fully serialized or deserialized, a detailed exception will be propagated back to the original caller.

Improved extensibility

Streams can now have custom data adaptors, allowing them to ingest data in any format. This gives developers greater control over how stream items are represented in storage. It also gives the stream provider control over how data is written, allowing steams to integrate with legacy systems and/or non-Orleans services.

Grain extensions allow additional behavior to be added to a grain at runtime by attaching a new component with its own communication interface. For example, Orleans transactions use grain extensions to add transaction lifecycle methods, such as Prepare, Commit, and Abort, to a grain transparently to the user. Grain extensions are now also available for Grain Services and System Targets.

Custom transactional state can now declare what roles it is able to fulfil in a transaction. For example, a transactional state implementation which writes transaction lifecycle events to a Service Bus queue cannot fulfil the duties of the transaction manager since it is write-only.

The predefined placement strategies are publicly accessible now, so that any placement director can be replaced during configuration time.

Join the effort

Now that Orleans 3.0 is out the door we are turning our attention to future releases — and we have some exciting plans! Come and join our warm, welcoming community on GitHub and Gitter and help us to make these plans a reality.

Orleans Team

The post Introducing Orleans 3.0 appeared first on .NET Blog.

Get Started with Visual Studio for Mac

$
0
0

The first step is often the hardest. Do you find yourself with great ideas for the next awesome app, website, or game but you never get around to making that first leap into the unknown? Today, I’ll help you with that! In this blog post, I’m going to walk through how to get started with Visual Studio for Mac.

Visual Studio for Mac is a macOS-native .NET IDE that focuses on .NET Core, Xamarin, and Unity. It provides many of the same features as Visual Studio for Windows, such as a shared C#, XAML, and web editor. For more information on Visual Studio for Mac, see our documentation.

Installation

Before writing any code, you’ll first need to download Visual Studio for Mac from https://visualstudio.microsoft.com/vs/mac/. Once downloaded, click on the .dmg to launch it. Double-click the installer icon to mount it and start your install experience. Click Open if you’re prompted with security messages.

Once the installer launches, agree to the licensing terms by pressing Continue.

On the component selection screen, illustrated below, you can select the components you want to install. The component you need to install depends on the type of app that you want to create:

  • .NET Core: Allows you to create .NET Core apps and libraries, ASP.NET Core Web apps, and Azure Functions.
  • Android: Allows you to build native Xamarin or Xamarin.Forms apps targeting the Android platform. Selecting this will also install OpenJDK and the latest Android SDK, both of which are required for Android development.
  • iOS: Allows you to build native Xamarin or Xamarin.Forms apps targeting iOS.
  • macOS: Allows you to build native Xamarin.Mac apps.

Note that you’ll need to separately install Xcode if you want to develop for iOS or Mac. I recommend that you do this once Visual Studio for Mac has finished installing.

In this post, I want to create an Azure Function, so I want to select the .NET Core option. Once you click Install, the installation will take approximately 10 minutes depending on how many components you selected and your internet speed.

You’ll be prompted to log in with your Microsoft account if this is your first time launching Visual Studio for Mac. I’m going to log in now to activate my Enterprise license and make it easier to publish my Function to Azure.

if you don’t have an Azure or Microsoft account, you can get one totally free ! This also comes with over $200 free Azure credits to spend as you see fit.

Next, you can configure the IDE to work in a way that works for you through keyboard shortcuts. I’m going to stick with Visual Studio for Mac shortcuts, but the bindings can be changed later through the Preferences menu item.

Visual Studio for Mac will then greet you with the Start Window. From here you can open an existing project from your machine, create a new project, or browse through a list of recent projects. However, before you go any further, you might want to make some changes so the IDE really works for you. This can all be done through the Preferences menu item (Visual Studio > Preferences), similar to Tools > Options in Visual Studio. Personally, I like to change to the dark theme and change my font to something bigger. I also like to show invisible characters on selection.

Create a new project

Now that you have the IDE configured in a way that works for you, you’re ready to start writing code! In the Start Window select New and then select Cloud > General > Azure Functions. In this example, I’m just using the HTTP Trigger, but you can use any template. For more information on other templates, see the Azure Functions documentation on docs.microsoft.com.

Name your project, press Next, set the Authorization level to Anonymous and click Next. If you want to use Git for version control, you can set that while creating the project. Click Create to open your project in Visual Studio for Mac:

Your solution and project will be loaded and should look like the image above. The most important parts of the IDE are described below:

  1. Solution Pad ­– The solution pad organizes all the projects, files, and folders in a solution. You can right-click on any item here to see its context actions allowing you to do things such as add references and publish to azure.
  2. Code Editor – This is where you will likely spend most of your time. This editor shares the same code components with Visual Studio, but with a native macOS UI. For more information in the editor, see the Source Editor docs.
  3. Debug/Run Controls ­– You can use the dropdown menus to set your run configuration, including the device or platform that you want to deploy to. When you’re ready to go, press the triangular “Start” button.
  4. Search Box – Search within your project, commands, or for a NuGet package from here.
  5. Workspace – The workspace consists of a main document area (an editor, designer surface, or options file) surrounded by pads containing useful information for the task at hand.
  6. Additional Pads – Visual Studio for Mac Pads are analogous to Panes in Visual Studio – they’re used to show additional information, tools, and navigation aids. Depending on the type of task, different pads will be displayed automatically. For more information on using pads in your workspace, refer to the Customizing the IDE documentation.

You’re now ready to start writing some code and creating something great!

Going further

Happy Developing! If you have any feedback or suggestions, please leave them in the comments below. You can also reach out to us on Twitter at @VisualStudioMac. For any issues that you run into when using Visual Studio for Mac, please Report a Problem.

The post Get Started with Visual Studio for Mac appeared first on Visual Studio Blog.


Windows expands support for robots

$
0
0

Robotics technology is moving fast. A lot has happened since Microsoft announced an experimental release of Robot Operating System (ROS™)[1] for Windows at last year’s ROSCON in Madrid. ROS support became generally available in May 2019, which enabled robots to take advantage of the worldwide Windows ecosystem—a rich device platform, world-class developer tools, integrated security, long-term support and a global partner network. In addition, we gave access to advanced Windows features like Windows Machine Learning and Vision Skills and provided connectivity to Microsoft Azure IoT cloud services.

At this year’s ROSCON event in Macau, we are happy to announce that we’ve continued advancing our ROS capabilities with ROS/ROS2 support, Visual Studio Code extension for ROS and Azure VM ROS template support for testing and simulation. This makes it easier and faster for developers to create ROS solutions to keep up with current technology and customer needs. We look forward to adding robots to the 900 million devices running on Windows 10 worldwide.

Visual Studio Code extension for ROS

In July, Microsoft published a preview of the VS Code extension for ROS based on a community-implemented release. Since then we’ve been expanding its functionality—adding support for Windows, debugging and visualization to enable easier development for ROS solutions. The extension supports:

  • Automatic environment configuration for ROS development
  • Starting, stopping and monitoring of ROS runtime status
  • Automatic discovery of build tasks
  • One-click ROS package creation
  • Shortcuts for rosrun and roslaunch
  • Linux ROS development

In addition, the extension adds support for debugging a ROS node leveraging the C++ and Python extensions. Currently in VS Code, developers can create a debug configuration for ROS to attach to a ROS node for debugging. In the October release, we are pleased to announce that the extension supports debugging ROS nodes launched from roslaunch at ROS startup.

Visual Studio Code extension for ROS showing ROS core status and debugging experience for roslaunch.

Visual Studio Code extension for ROS showing ROS core status and debugging experience for roslaunch.

Unified Robot Description Format (URDF) is an XML format for representing a robot model, and Xacro is an XML macro language to simplify URDF files. The extension integrates support to preview a URDF/Xacro file leveraging the Robot Web Tools, which helps ROS developers easily make edits and instantly visualize the changes in VS Code.

Visual Studio Code extension for ROS showing a preview of URDF.

Visual Studio Code extension for ROS showing a preview of URDF.

For developers who are building ROS2 applications, the extension introduces ROS2 support including workspace discovery, runtime status monitor and built tool integration. We’d like to provide a consistent developer experience for both ROS and ROS2 and will continue to expand support based on community feedback.

ROS on Windows VM template in Azure

With the move to the cloud, many developers have adopted agile development methods. They often want to deploy their applications to the cloud for testing and simulation scenarios when their development is complete. They iterate quickly and repeatedly deploy their solutions to the cloud. Azure Resource Manager template is a JavaScript Object Notation (JSON) file that defines the infrastructure and configuration for a project. To facilitate the cloud-based testing and deployment flow, we publish a ROS on Windows VM template that creates a Windows VM and installs the latest ROS on Windows build into the VM using the CustomScript extension. You can try it out here.

Expanding ROS and ROS2 support

Microsoft is expanding support for ROS and ROS2, including creating Microsoft-supported ROS nodes and building and providing Chocolatey packages for the next releases of ROS (Noetic Ninjemys) and ROS2 (Eloquent Elusor).

Azure Kinect ROS Driver

Internal visualization of the Azure Kinect.

Internal visualization of the Azure Kinect.

The Azure Kinect Developer Kit is the latest Kinect sensor from Microsoft. The Azure Kinect contains the same depth sensor used in the Hololens 2, as well as a 4K camera, a hardware-synchronized accelerometer & gyroscope (IMU), and a 7-element microphone array. Along with the hardware release, Microsoft made available a ROS node for driving the Azure Kinect and soon will support ROS2.

The Azure Kinect ROS Node emits a PointCloud2 stream, which includes depth information and color information, along with depth images, the raw image data from both the IR & RGB cameras and high-rate IMU data.

Colorized Pointcloud output of Azure Kinect in the tool rViz

Colorized Pointcloud output of Azure Kinect in the tool rViz.

A Community contribution has also enabled body tracking! This links to the Azure Kinect Body Tracking SDK and outputs image masks of each tracked individual and poses of body tracking joints as markers.

A visualization of Skeletal Tracking in rViz

A visualization of Skeletal Tracking in rViz.

You can order a Azure Kinect DK at the Microsoft Store, then get started using the Azure Kinect ROS node here.

Windows ML Tracking ROS Node

The Windows Machine Learning API enables developers to use pre-trained machine learning models in their apps on Windows 10 devices. This offers developers several benefits:

  • Low latency, real-time results: Windows can perform AI evaluation tasks using the local processing capabilities of the PC with hardware acceleration using any DirectX 12 GPU. This enables real-time analysis of large local data, such as images and video. Results can be delivered quickly and efficiently for use in performance intensive workloads like game engines, or background tasks such as indexing for search.
  • Reduced operational costs: Together with the Microsoft Cloud AI platform, developers can build affordable, end-to-end AI solutions that combine training models in Azure with deployment to Windows devices for evaluation. Significant savings can be realized by reducing or eliminating costs associated with bandwidth due to ingestion of large data sets, such as camera footage or sensor telemetry. Complex workloads can be processed in real-time on the edge with minimal sample data sent to the cloud for improved training on observations.
  • Flexibility: Developers can choose to perform AI tasks on device or in the cloud based on what their customers and scenarios need. AI processing can happen on the device if it becomes disconnected, or in scenarios where data cannot be sent to the cloud due to cost, size, policy or customer preference.

The Windows Machine Learning ROS node will hardware accelerate the inferencing of your Machine Learning models, publishing a visualization marker relative to the frame of image publisher. The output of Windows ML can be used for obstacle avoidance, docking or manipulation.

Visualizing the output of a model with Windows ML. Model used with permission

Visualizing the output of a model with Windows ML. Model used with permission: www.thingiverse.com/thing:1911808.

Azure IoT Hub ROS Node

Enable highly secure and reliable communication between your IoT application and the devices it manages. Azure IoT Hub provides a cloud-hosted solution backend to connect virtually any device. Extend your solution from the cloud to the edge with per-device authentication, built-in device management and scaled provisioning.

The Azure IoT Hub ROS Node allows you to stream ROS Messages through Azure IoT Hub. These messages can be processed with an Azure Function, streamed to a Blob Store or processed through Azure stream analytics for anomaly detection. Additionally, the Azure IoT Hub ROS Node allows you to change properties in the ROS Parameter server using Dynamic Reconfigure with properties set on the Azure IoT Hub Device Twin.

Come learn more and see some of these technologies in action at ROSCON 2019 in Macau. We’re hosting a booth throughout the event (October 31 – November 1), as well as a talk on Friday afternoon. You can get started with ROS on Windows here.

[1] ROS is a trademark of Open Robotics

The post Windows expands support for robots appeared first on Windows Developer Blog.

Continuously deploy and monitor your UWP, WPF, and Windows Forms app with App Center

$
0
0

App Center is an integrated developer solution with the mission of helping developers build better apps. Last week, we announced General Availability support of distribute, analytics and diagnostics service for WPF and Windows Forms desktop applications. We also expanded our existing UWP offerings to include crash and error reporting for sideloaded UWP apps.

In this blog, we’ll highlight how App Center can help you continuously ship higher quality apps. Get started in minutes by creating an App Center account.

Managing your releases

App Center Distribute makes releasing apps quick and simple so you can ship more frequently to gather feedback and continuously improve your app.

Invite your testing teams and end users via email and organize them into groups to easily manage your releases. Simply upload an .app, .appxbundle, .appxupload, .msi, .msix, or .msixupload package to App Center and your end users will a receive a link to download the latest release.

Whether it’s a new feature or a bug fix, with App Center Distribute, you can quickly deploy a new release to your users in minutes.

Monitoring app analytics

Once you release your app to your users, how do you know what features your users are using? App Center Analytics provides out of the box usage metrics such as active users, sessions, devices, languages, and more.

You can easily define custom events and properties to understand if your users are using the new features you built, what trends are occurring so you can ultimately improve the user experience.

Diagnosing app issues

No matter how much testing is done, your apps will inevitably ship with bugs . App Center Diagnostics helps you monitor, prioritize, and fix issues in your app so you can be proactive about your app health instead of waiting for those negative reviews and complaints from frustrated customers.

Simply integrate the App Center Diagnostics SDK and you’ll see your crashes and errors smartly grouped with the number of users affected, and other important information to help you fix your crashes.

Crashes

App Center will process and display your app crashes with complete stack traces and contextual information that helps you pinpoint the root cause faster. You can add attachments or track specific events to better understand user activity before the crash. App Center Diagnostics also integrates seamlessly with all your current bug tracking tools including JIRA, GitHub, and Azure DevOps so your team can stay organized.

Errors

Not every issue will result in an app crash but these can be just as important in helping you detect and prevent issues. If you know where an issue might occur, you can track non fatal errors by using an App Center method inside a try/catch block.

Other services

For UWP apps, App Center offers build and push service.

Automating app builds

App Center Build helps provides fast and secure builds on managed, cloud-hosted machines. Just connect a GitHub, BitBucket, Azure DevOps or GitLab repo and automate builds in minutes. Learn more here.

Sending push notifications

App Center Push provides an easy solution for you to send push notifications to specific users and devices.

Get started today!

Create an App Center account. You can also follow us @VSAppCenter on Twitter for the latest updates and give us feedback via AppCenter on GitHub to let us know what you’d like to see.

The post Continuously deploy and monitor your UWP, WPF, and Windows Forms app with App Center appeared first on .NET Blog.

Inspecting Docker Containers with Visual Studio Code

Adafruit’s Circuit Playground Express simulated Visual Studio Code’s Device Simulator Express

$
0
0

I'm an unabashed Adafruit fan and I often talking about them because I'm always making cool stuff with their hardware and excellent tutorials. You should check out the YouTube video we made when I visited Adafruit Industries in New York with my nephew. They're just a lovely company.

While you're at it, go sign up for the Adabox Subscription and get amazing hardware projects mailed to you in a mystery box regularly!

One of the devices I keep coming back to is the extremely versatile Circuit Playground Express. It's under $25 and does a LOT.

It's got 10 NeoPixels, a motion sensor, temp sensor, light sensor, sound sensor, buttons, a slide, and a speaker. It even can receive and transmit IR for any remote control. It's great for younger kids because you can use alligator clips for the input output pins which means no soldering for easy projects.

You can also mount the Circuit Playground Express onto a Crickit which is the "Creative Robotics &amp; Interactive Construction Kit. It's an add-on lets you #MakeRobotFriend using CircuitPython, MakeCode, or Arduino." The Crickit makes it easy to control motors and adds additional power options to drive them! Great for creating small bots or battlebots as my kids do.

MakeCode

The most significant - and technically impressive, in my opinion - aspect of the Circuit Playground Express is that it doesn't dictate the tech you use! There's 3 great ways to start.

  • Start your journey with Microsoft MakeCode block-based or Javascript programming.
  • Then, you can use the same board to try CircuitPython, with the Python interpreter running right on the Express.
  • As you progress, you can advance to using Arduino IDE, which has full support of all the hardware down to the low level, so you can make powerful projects.

Start by exploring MakeCode for Circuit Playground Express by just visiting https://makecode.adafruit.com/ and running in the browser!

Device Simulator Express for Adafruit Circuit Playground Express

Next, check out the Device Simulator Express extension for Visual Studio Code! This was made over the summer by Christella Cidolit, Fatou Mounezo, Jonathan Wang, Lea Akkari, Luke Slevinsky, Michelle Yao, and Rachel Phinnemore, the interns at the Microsoft Garage Vancouver!

Christella Cidolit, Fatou Mounezo, Jonathan Wang, Lea Akkari, Luke Slevinsky, Michelle Yao, and Rachel Phinnemore

This great extension lets YOU, Dear Reader, code for a Circuit Playground Express without the physical hardware! And when you've got one in your hards, it makes development even easier. That means:

  • Device simulation for those without hardware
  • Code deployment to devices
  • Auto-completion and error flagging
  • Debugging with the simulator

You'll need these things:

Fire up Visual Studio Code with the Device Simulator Express extension installed and then select "Device Simulator Express: New File" in the command palette (CTRL+SHIFT+P to open the palette).

Device Simulator Express

There's a lot of potential here! You've got the simulated device on the right and the Python code on the left. There's step by step debugging in this virtual device. There's a few cool things I can think of to make this extension easier to set up and get started that would be it a killer experience for an intermediate developer who is graduating from MakeCode into a Code editor like VS Code.

It's early days and the interns are back in school but I'm hoping to see this project move forward and get improved. I'll blog more details as I have them!


Sponsor: Like C#? We do too! That’s why we've developed a fast, smart, cross-platform .NET IDE which gives you even more coding power. Clever code analysis, rich code completion, instant search and navigation, an advanced debugger... With JetBrains Rider, everything you need is at your fingertips. Code C# at the speed of thought on Linux, Mac, or Windows. Try JetBrains Rider today!


© 2019 Scott Hanselman. All rights reserved.
     

More Bird’s Eye imagery has been released and static maps API support added!

$
0
0

Since our blog post in July highlighting new Bird’s Eye imagery, we’ve released more of our high resolution oblique 45-degree angle aerial Bird’s Eye imagery and just want to make sure you’re aware of this continued imagery expansion. The recent release of new Bird’s Eye over the last few months represents approximately 50,000 square kilometers of new Bird’s Eye imagery spanning 70 cities in the United States.

While Bird’s Eye has always been available in the Bing Maps Web Control and via direct tile access in the Bing Maps REST Get Imagery Metadata API, we’re excited to announce we now make this imagery available as static maps in the Bing Maps REST Get a Static Map API. The Bing Maps team is committed to making maps and imagery accessible through a variety of methods so you can deliver it to your users in easy and compelling ways.

Here are some great examples of the recent Bird’s Eye imagery that has been released to Bing Maps:

Coit Tower, San Francisco, CA
Coit Tower, San Francisco, CA, on Bing Maps -https://binged.it/2ON27Ix

Lambeau Field, Green Bay, WILambeau Field, Green Bay, WI, on Bing Maps - https://binged.it/32hVQZc

Montana State Capitol Building, Helena, MTMontana State Capitol Building, Helena, MT on Bing Maps - https://binged.it/2MJV4gX

William J. Clinton National Library, Little Rock, ARWilliam J. Clinton National Library, Little Rock, AR on Bing Maps - https://binged.it/2IP3y5B

Microsoft Commons, Redmond, WAMicrosoft Commons, Redmond, WA on Bing Maps - https://binged.it/32jsCsU

Cities and areas of interest that have recently been updated with new Bird’s Eye imagery:

 
Ashland, OR Greece, NY Olympia, WA
Bellevue, WA Green Bay, WI Outer Banks, NC 
Benton, AR Greenville, SC Oxnard, CA
Berkeley, CA Hayward, CA  Provo, UT
Billings, MT Hartford, CT Redmond, WA
Birmingham, AL Helena, MT Richmond, VA
Brick, NJ Hollywood, CA Rochester, NY
Cabot, AR Homestead, FL San Francisco, CA
Canandaigua, NY Huntington Beach, CA Santa Barbara, CA
Clearwater, FL Lake Stevens, WA Snoqualmie, WA
Cheyenne, WY Inglewood, CA Seattle, WA
Cincinnati, OH Lake Stevens, WA Snoqualmie, WA
Clearwater, FL Leeds, AL South Hill, WA
Compton, CA Lexington, KY Spokane, WA
Corcoran, MN Lincoln, NE Springfield, MO
Dayton, OH Lithonia, GA Staten Island, NY
Douglasville, GA Little Rock, AR Tacoma, WA
Enumclaw, WA Marietta, GA Toledo, OH
Eugene, OR Milton, GA Waterbury, CT
Everett, WA Minneapolis, MN Whittier, CA
Fairburn, GA Monroe, WA Woodstock, GA
Fort Lonesome, FL New Brunswick, NJ Yakima, WA
Framingham, MA North Little Rock, AR
Frankfurt, KY Ogden, UT

More Bird’s Eye imagery will continue to be released over the coming months, so please check back soon for further updates.

- Bing Maps Team

Viewing all 5971 articles
Browse latest View live


<script src="https://jsc.adskeeper.com/r/s/rssing.com.1596347.js" async> </script>